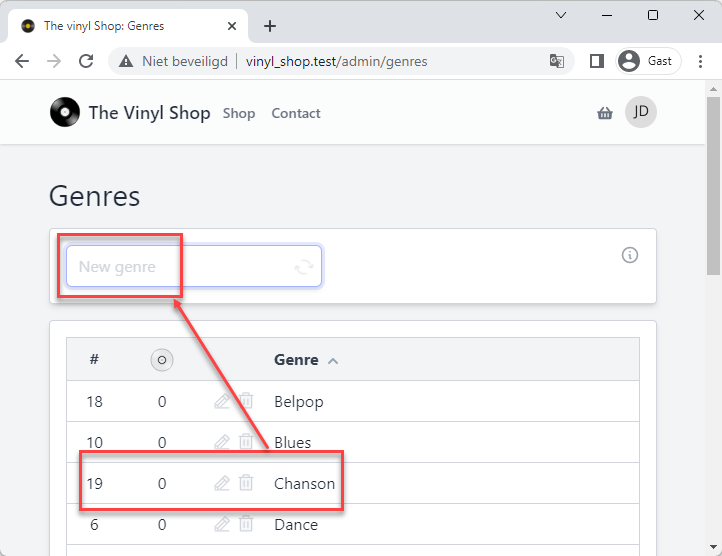
Create a new Livewire component with the terminal command php artisan make:livewire Admin/Genres
app/Http/Livewire/Admin/Genres.php (the component class)
resources/views/livewire/admin/genres.blade.php (the component view)
Open the component class and change the layout to layouts.vinylshop
classGenresextendsComponent{publicfunctionrender(){returnview('livewire.admin.genres')->layout('layouts.vinylshop',['description'=>'Manage the genres of your vinyl records','title'=>'Genres',]);}}
Line 4 - 5: add two properties $orderBy and $orderAsc to the class
Line 9: select all genres with the number of records in each genre
Line 10: order the results by the $orderBy property and the $orderAsc property
If $orderAsc is true the results will ->orderBy('name', 'asc')
If $orderAsc is fales the results will ->orderBy('name', 'desc')
Line 12: send the results to the view
classGenresextendsComponent{// sort propertiespublic$orderBy='name';public$orderAsc=true;publicfunctionrender(){$genres= Genre::withCount('records')->orderBy($this->orderBy,$this->orderAsc?'asc':'desc')->get();returnview('livewire.admin.genres',compact('genres'))->layout('layouts.vinylshop',['description'=>'Manage the genres of your vinyl records','title'=>'Genres',]);}}
1 2 3 4 5 6 7 8 9 10 11 12 13 14 15 16 17 18
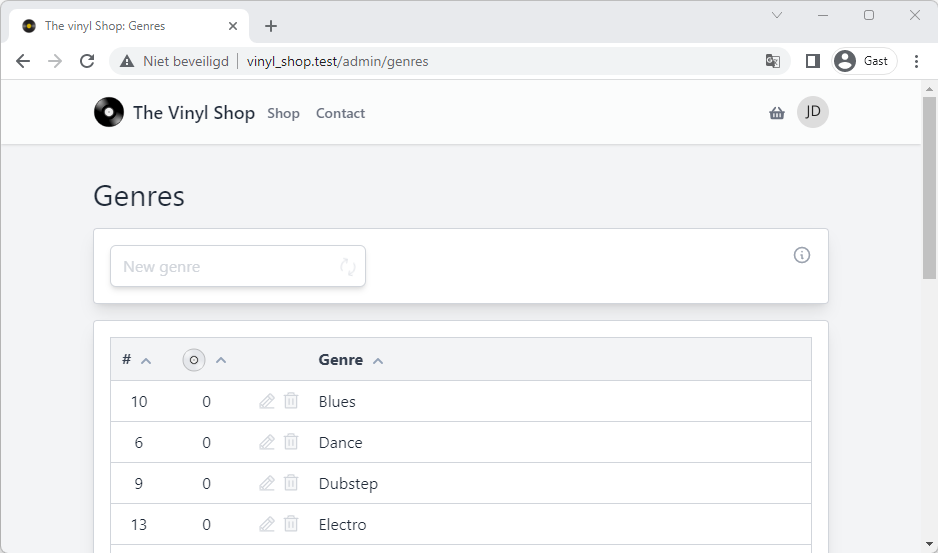
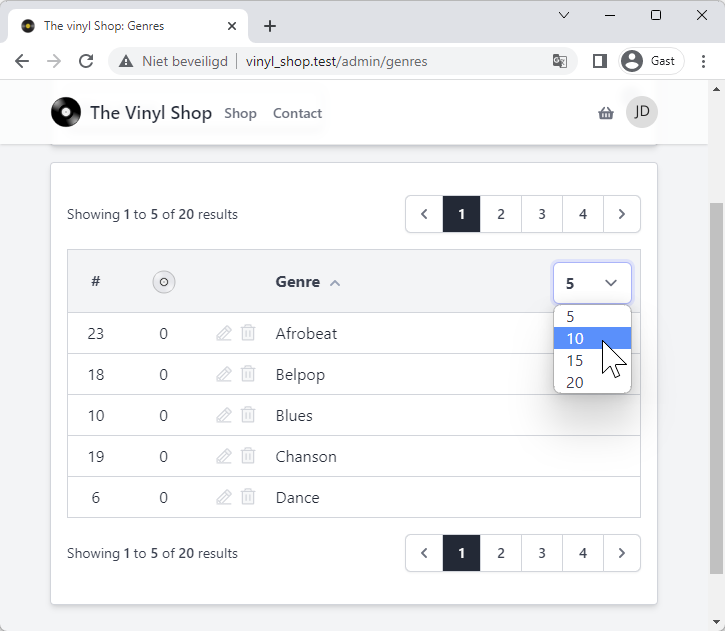
Line 2 and 18: loop, inside the <tbody> tag, through the $genres variable
Line 4: show the id of the genre in the first column
Line 5: show the number of records that belong to the genre in the second column
Line 15: show the name of the genre in the last column
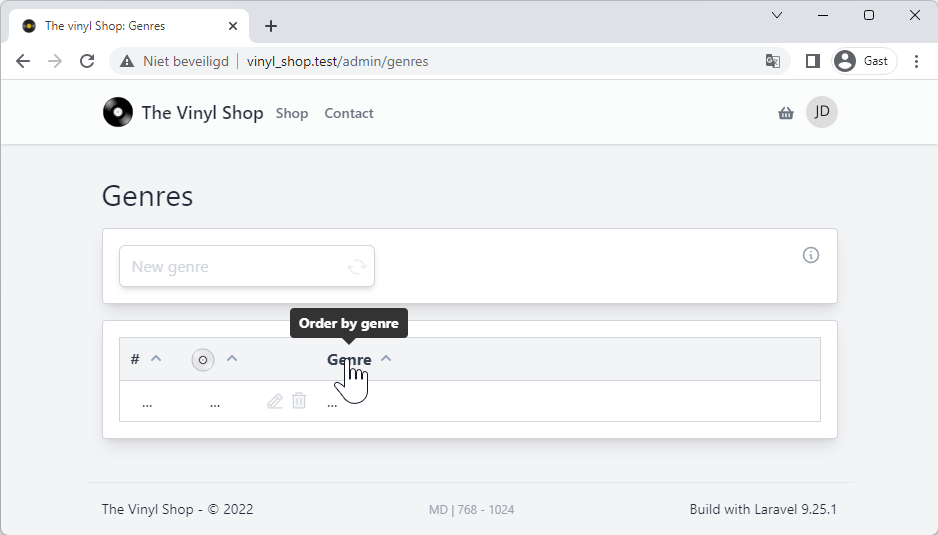
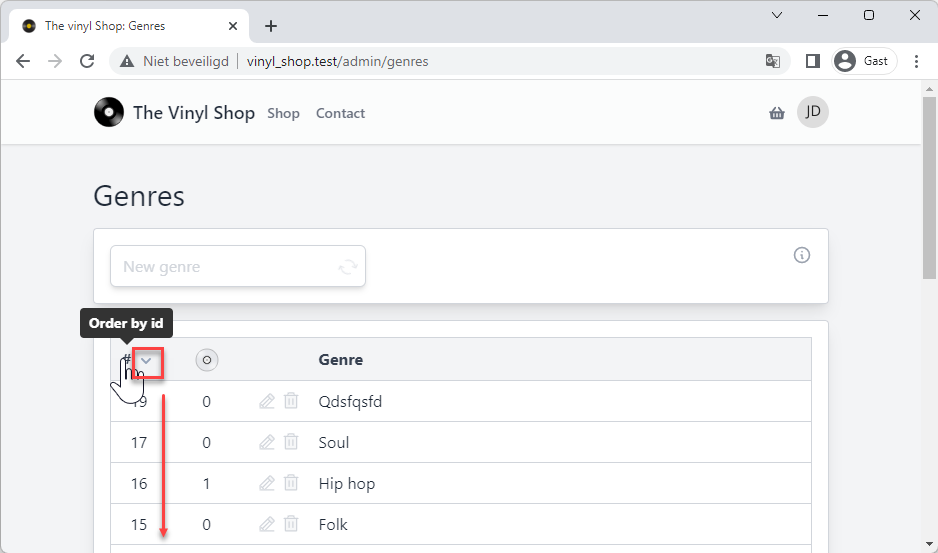
# Order the table by clicking on the column headers
Line 8 - 14: click twice or more on the column header to change the order
If the column is already ordered by the column header, the order will be reversed
If the column is not ordered by the column header, the order will be ascending
Line 13: set the $orderBy property to the column header that is clicked
classGenresextendsComponent{...// resort the genres by the given columnpublicfunctionresort($column){if($this->orderBy===$column){$this->orderAsc=!$this->orderAsc;}else{$this->orderAsc=true;}$this->orderBy=$column;}...}
1 2 3 4 5 6 7 8 9 10 11 12 13 14 15 16 17
Call, with the wire:click directive, the resort method with the column name to sort by as parameter
Line 3: add wire:click="resort('id')" to the first table header
Line 6: add wire:click="resort('records_count')" to the second table header
Line 10: add wire:click="resort('name')" to the last table header
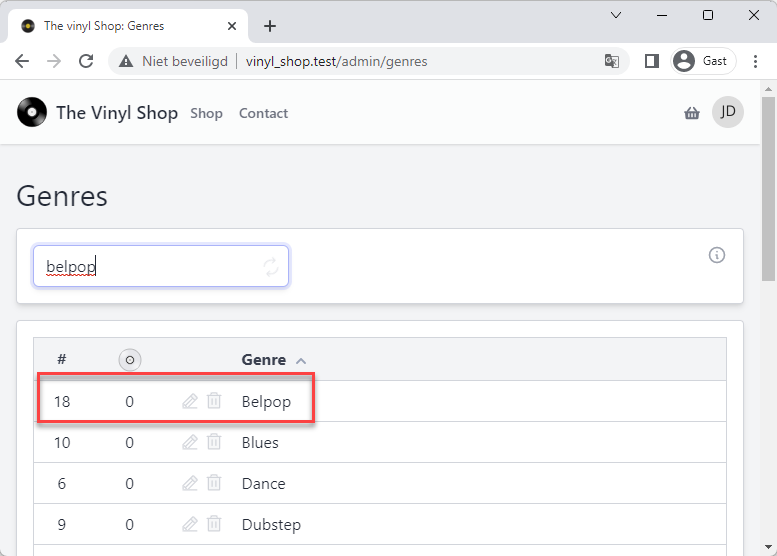
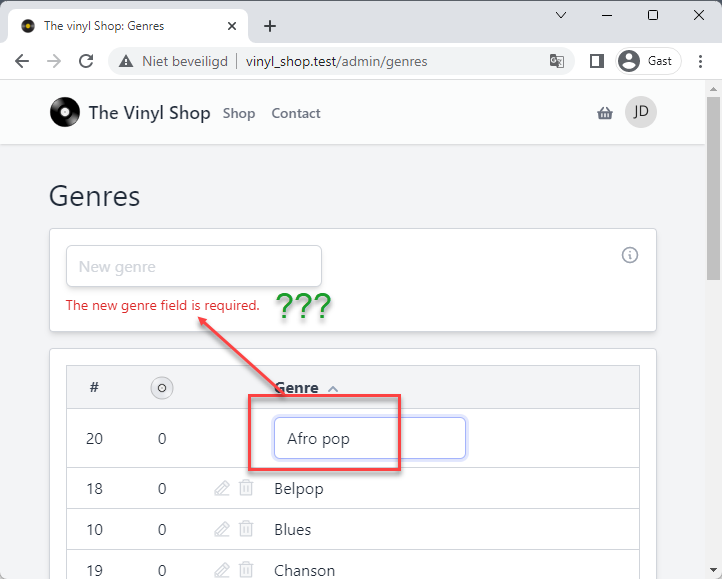
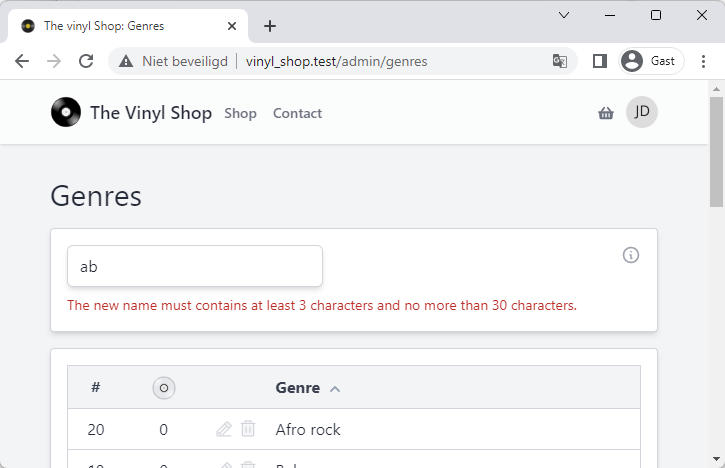
Line 15: validate the $newGenre property before creating the genre
Line 17 - 19: create a new genre with the $newGenre property as the name of the genre
(Tip: the PHP trim() function removes all whitespace from the beginning and end of a string)
classGenreextendsComponent{...public$newGenre;// validation rulesprotected$rules=['newGenre'=>'required|min:3|max:30|unique:genres,name',];// create a new genrepublicfunctioncreateGenre(){// validate the new genre name$this->validate();// create the genre
Genre::create(['name'=>trim($this->newGenre),]);}...}
One important difference between Genre::create() and $genre->save() is that the Genre::create() is more secure
because it passes the $fillable (or $guarded) properties of the model where $genre->save() does not.
After a new genre is created, the input field should be cleared
This can be done by setting the $newGenre property to an empty string
And also the resetErrorBag() method or the resetValidation() method must be called to clear the validation errors (if there are any)
When we click on the Esc key, the input field should be cleared as well
Because we have to do this in two places, we will create a methode resetNewGenre() to do this
Line 18: call the resetNewGenre() method after creating the genre
Line 2 - 6: create a new method resetNewGenre() to clear the $newGenre property and the validation errors
Line 4: reset the $newGenre property to its default value (an empty string)
Line 5: call the resetErrorBag() method to clear all the validation errors
// reset $newGenre and validationpublicfunctionresetNewGenre(){$this->reset('newGenre');$this->resetErrorBag();}// create a new genrepublicfunctioncreateGenre(){// validate the new genre name$this->validate();// create the genre
Genre::create(['name'=>trim($this->newGenre),]);// reset $newGenre$this->resetNewGenre();}
1 2 3 4 5 6 7 8 9 10 11 12 13 14 15 16 17 18 19
Line 6: call the resetNewGenre() method when the Esc key is pressed
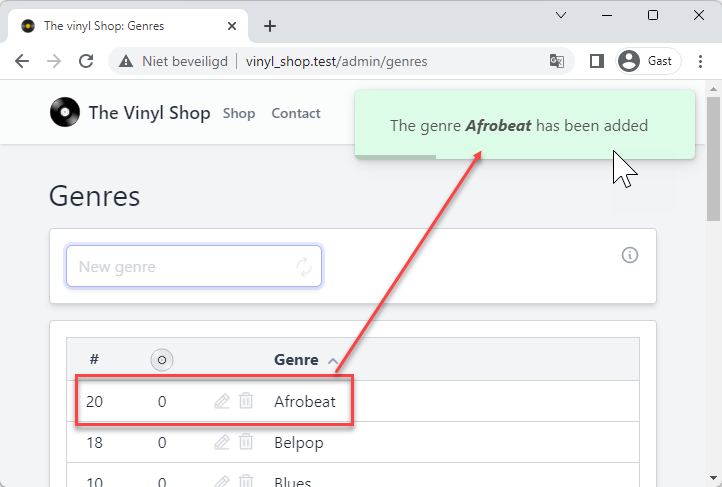
After a new genre is created, we will emit a browser event with the name swal:toast and pass the name of the new genre as the html message for out toast
Line 7: add the newly created genre to the variable $genre so we can use it in our toast message
(Replace Genre::create([...]); with $genre = Genre::create([...]);)
Line 13 - 16: emmit a browser event with the name swal:toast
Line 14: set the background color to success (a light green color)
Line 15: include the name of the new genre in the toast message
// create a new genrepublicfunctioncreateGenre(){// validate the new genre name$this->validate();// create the genre$genre= Genre::create(['name'=>trim($this->newGenre),]);// reset $newGenre$this->resetNewGenre();// toast$this->dispatchBrowserEvent('swal:toast',['background'=>'success','html'=>"The genre <b><i>{$genre->name}</i></b> has been added",]);}
1 2 3 4 5 6 7 8 9 10 11 12 13 14 15 16 17
Add a genre and check if the list is updated automatically
The spinner icon (the subtle gray icon in the right corner of the input field) should only be visible when the createGenre() method is running
We can do this by using the wire:loading directive like we did before
Line 9: wire:loading runs every time one of the methods is called
Line 10: to make it more specific, we can use wire:target to specify ONLY ONE method that should be watched, in our case we want to watch the createGenre() method
Line 11: change the color of text-gray-200 to text-gray-500 so that the spinner stands out a little more
This property contains an array with the keys id and name and is initialized with empty values (null)
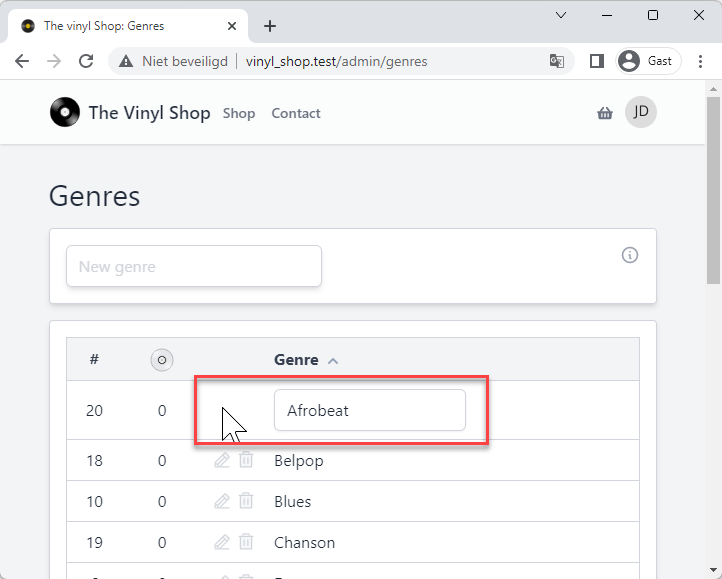
Line 11 - 17: when the Pencil icon is clicked, the editGenre() method is called and the id of the genre is passed as a parameter
Line 11: Use "route model binding" to get the full genre as the id is passed as a parameter
Line 13 - 16: set the $editGenre property to the id and name of the selected genre
classGenresextendsComponent{...public$newGenre;public$editGenre=['id'=>null,'name'=>null];...// edit the value of $editGenre (show inlined edit form)publicfunctioneditExistingGenre(Genre $genre){$this->editGenre=['id'=>$genre->id,'name'=>$genre->name,];}publicfunctionrender(){...}}
Line 3: add a wire:key to the tr element to make sure that each row has a unique key
Line 8 and 16: the td element is only visible when the value of $editGenre['id']is not equal to the id of the genre that is being edited
Line 11: click on the Pencil icon will call the editExistingGenre() method and pass the id of the genre as a parameter
Line 18, 22 and 31:
the value of $editGenre['id']is not equal to the id of the genre that is being edited
show the name of the genre
else
show an input field and bind the value to the name key of the $editGenre property
(Livewire converts the array $editGenre as an object to the view, so we have to use the dot-notation to get a value: editGenre.name)
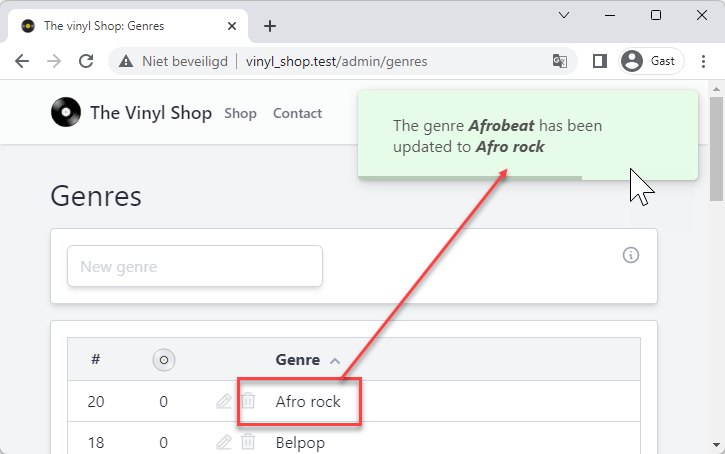
The functionality to update the genre is almost the same as the functionality to create a genre
Click the Enter or Tab key to save the changes
Click the Escape key to cancel the changes
Validate the input field before saving the changes
Show an error message when the validation fails
Show a success toast when the genre is updated
Line 8: use the same validation rules as for the newGenre property
Line 15 - 19: this function resets the $editGenre property to its initial value and clears the validation errors
Don't use the reset() method without a parameter, because this will reset all properties (inc. the $orderBy and $orderAsc properties)
Line 23 - 38:
Validate the input field before saving the changes and show an error message when the validation fails
Save the original (not yet updated) name of the genre in a variable $oldName
Update the genre in the database with $genre->update([...])
call the resetEditGenre() method to reset the $editGenre property and the validation errors
Dispatch a success toast
classGenresextendsComponent{...// validation rulesprotected$rules=['newGenre'=>'required|min:3|max:30|unique:genres,name','editGenre.name'=>'required|min:3|max:30|unique:genres,name',];// reset $newGenre and validationpublicfunctionresetNewGenre(){...}// reset $editGenre and validationpublicfunctionresetEditGenre(){$this->reset('editGenre');$this->resetErrorBag();}// update an existing genrepublicfunctionupdateGenre(Genre $genre){$this->validate();$oldName=$genre->name;$genre->update(['name'=>trim($this->editGenre['name']),]);$this->resetEditGenre();$this->dispatchBrowserEvent('swal:toast',['background'=>'success','html'=>"The genre <b><i>{$oldName}</i></b> has been updated to <b><i>{$genre->name}</i></b>",]);}...}
Click on the Pencil icons and try to change the name of the genre:
e.g. from 'Afrobeat' to 'Afro rock'
Hit the Enter or Tab key to save the changes
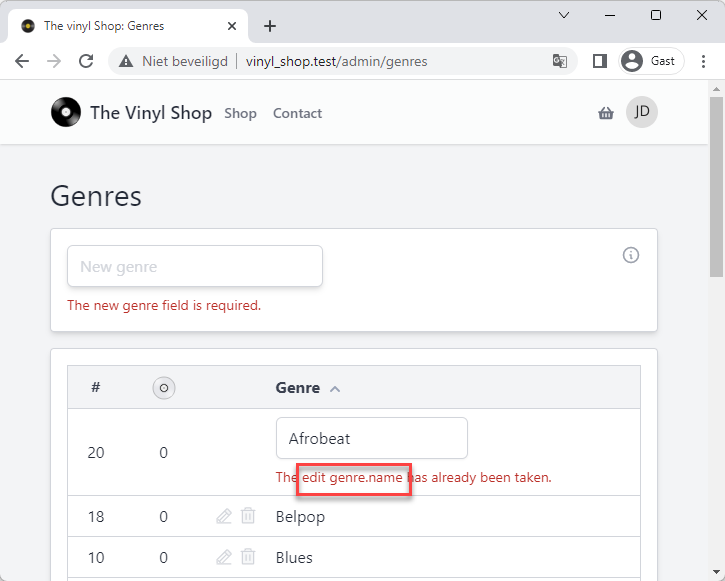
This doesn't work yet, because we validate ALL input fields, but we only need to validate the input field of the genre that is being edited
Solution:
use the validateOnly() method instead of the validate() method
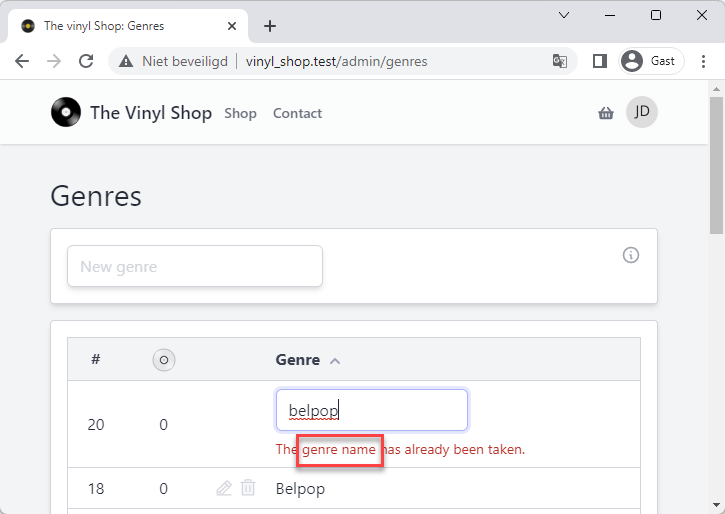
Click on the Pencil icons and change nothing
Hit the Enter or Tab key
This doesn't work either, because the name of the genre must be different from the original name and we get a somewhat strange description for the field that is being validated (... edit genre.name ...)
Solution:
update the validation rule to check if the name is unique except for the genre that is being edited
rename the validation attribute from editGenre.name to genre name
Line 16: replace the validate() method with the validateOnly('editGenre.name'); method
Line 24: replace the validate() method with the validateOnly('newGenre'); method
classGenresextendsComponent{...// validation rulesprotected$rules=['newGenre'=>'required|min:3|max:30|unique:genres,name','editGenre.name'=>'required|min:3|max:30|unique:genres,name',];...// update an existing genrepublicfunctionupdateGenre(Genre $genre){$this->validateOnly('editGenre.name');...}// create a new genrepublicfunctioncreateGenre(){// validate the new genre name$this->validateOnly('newGenre');...}...}
If you want to keep the default Laravel validation messages, but just customize the :attribute portion of the message,
you can specify custom attribute names using the $validationAttributes property
Line 12: change the default validation attribute name from editGenre.name to genre name
It's also possible to customize the entire validation message using the $messages property
You have to write a custom message for each rule that you want to customize
In the example below, we update the validation messages for all rules that are used in the rules() method
If you do so, you can remove the $validationAttributes property because the custom messages override the default messages
// validation rulespublicfunctionrules(){return['newGenre'=>'required|min:3|max:30|unique:genres,name','editGenre.name'=>'required|min:3|max:30|unique:genres,name,'.$this->editGenre['id'],];}// validation attributes/*protected $validationAttributes = [
'editGenre.name' => 'genre name',
];*/// custom validation messagesprotected$messages=['newGenre.required'=>'Please enter a genre name.','newGenre.min'=>'The new name must contains at least 3 characters and no more than 30 characters.','newGenre.max'=>'The new name must contains at least 3 characters and no more than 30 characters.','newGenre.unique'=>'This name already exists.','editGenre.name.required'=>'Please enter a genre name.','editGenre.name.min'=>'This name is too short (must be between 3 and 30 characters).','editGenre.name.max'=>'This name is too long (must be between 3 and 30 characters)','editGenre.name.unique'=>'This name is already in use.',];
If you don't want to lose any data, test this functionality with a newly created genres (that is not linked to any record in the database), e.g. 'afrobeat'!
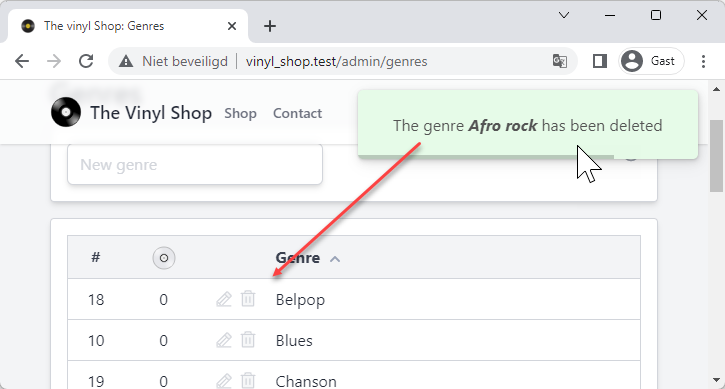
Line 6: add a deleteGenre() method that will be called when the user clicks on the Trash icon
Use route model binding to get the genre that has to be deleted
Line 8: delete the genre
Line 9 - 12: show a toast message that the genre is deleted
classGenresextendsComponent{...// delete a genrepublicfunctiondeleteGenre(Genre $genre){$genre->delete();$this->dispatchBrowserEvent('swal:toast',['background'=>'success','html'=>"The genre <b><i>{$genre->name}</i></b> has been deleted",]);}...}
1 2 3 4 5 6 7 8 9 10 11 12 13 14 15 16
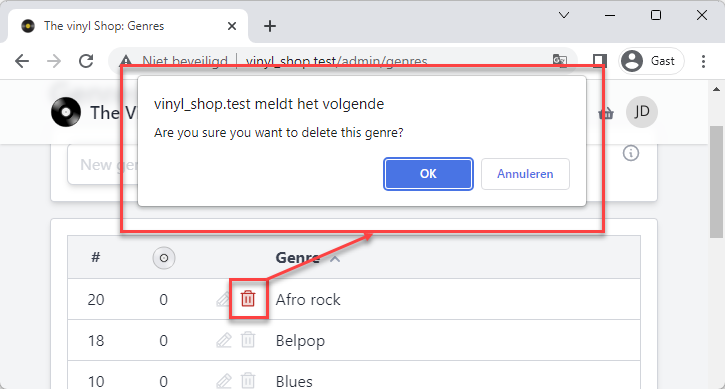
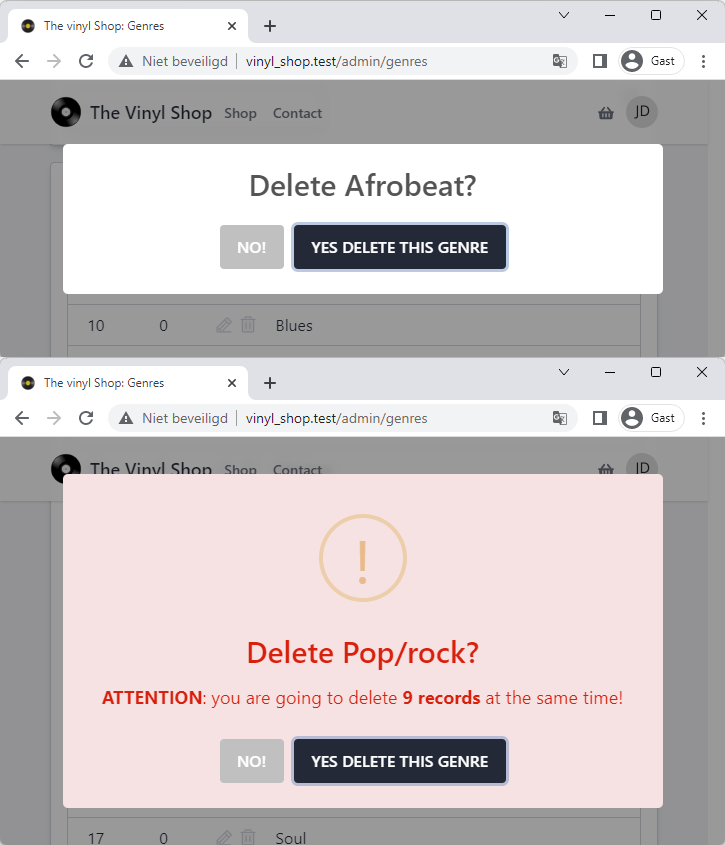
Because confirm() is a pure JavaScript function, we also need some client-side JavaScript to open the confirm dialog
Alpine is a good choice for this:
Line 2: initialize a new Alpine component
Line 9: add a @click event to the Trash icon to open the confirm dialog
If the user clicks OK, the confirm(...) returns true and the Livewire methodedeleteGenre() method is called
If the user clicks Cancel, the confirm(...) returns false and nothing happens
<td
x-data="">
@if($editGenre['id']!==$genre->id)<div class="flex gap-1 justify-center [&>*]:cursor-pointer [&>*]:outline-0 [&>*]:transition"><x-phosphor-pencil-line-duotone
wire:click="editExistingGenre({{ $genre->id }})"class="w-5 text-gray-300 hover:text-green-600"/><x-phosphor-trash-duotone
@click="confirm('Are you sure you want to delete this genre?') ? $wire.deleteGenre({{ $genre->id }}) : ''"class="w-5 text-gray-300 hover:text-red-600"/></div>
@endif</td>
There are some things that can be improved in the user experience:
In edit mode, the cursor should be in the input field (now the user has to click in the input field to start typing)
Create and edit a genre: when clicking the Escape, Return or Tab key, the input field is still editable, and we have to wait for the server response before everything is back to normal
We want to temporary disable the input field while the server is processing the request
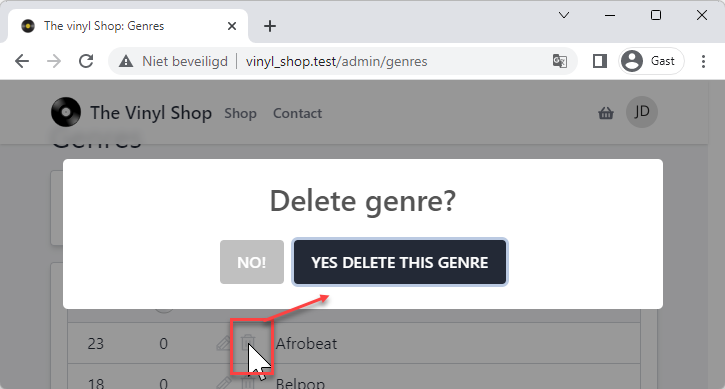
The default JavaScript confirm() dialog is not very pretty
We can use the SweetAlert2 dialog to create a more beautiful dialog