# Reusable components
TIP
Free to use components for your Laravel projects
- In this section, we will DRY up our code by using reusable Blade components
- Blade components allow us to follow the DRY or “Don’t Repeat Yourself” principle which means that we can reuse the component anywhere in our application
- In a previous chapter we were already introduced to (static) Blade components, but now we are going to make them dynamic
- Laravel has two types of components:
- components with a dedicated class: e.g. the layout component
- components without a class (anonymous components): e.g. the navigation and footer in the layout
- In this chapter we generate some anonymous components that we will use later in the course
REMARKS
- Anonymous components MUST be placed inside the resources/views/components folder and be rendered with the
x-prefix, followed by the path and name of the Blade file - The path and name are separated by a dot
- When an
index.blade.phpfile exists for the component, it will be rendered as the "root" node of the component
| component | Render |
|---|---|
resources/views/components/list.blade.php | <x-list> |
resources/views/components/list/index.blade.php | <x-list> |
resources/views/components/alert.blade.php | <x-alert> |
resources/views/components/alert/index.blade.php | <x-alert> |
resources/views/components/alert/icon.blade.php | <x-alert.icon> |
- We create our components in a subfolder resources/views/components/tmk (Thomas More Kempen 😉) so that we can be sure that they will not be overwritten if you later install any online component libraries
TIP
- Create a (temporary) playground page (resources/views/playground.blade.php) that we can use to test our components
- Create a route to the playground page in routes/web.php
routes/web.php
resources/views/playground.blade.php
Route::view('/', 'home')->name('home'); Route::view('contact', 'contact')->name('contact'); Route::view('playground', 'playground')->name('playground'); Route::prefix('admin')->name('admin.')->group(function (){ Route::redirect('/', '/admin/records'); Route::get('records', [RecordController::class, 'index'])->name('records.index'); });Copied!
1
2
3
4
5
6
7
8
9
2
3
4
5
6
7
8
9
# List component
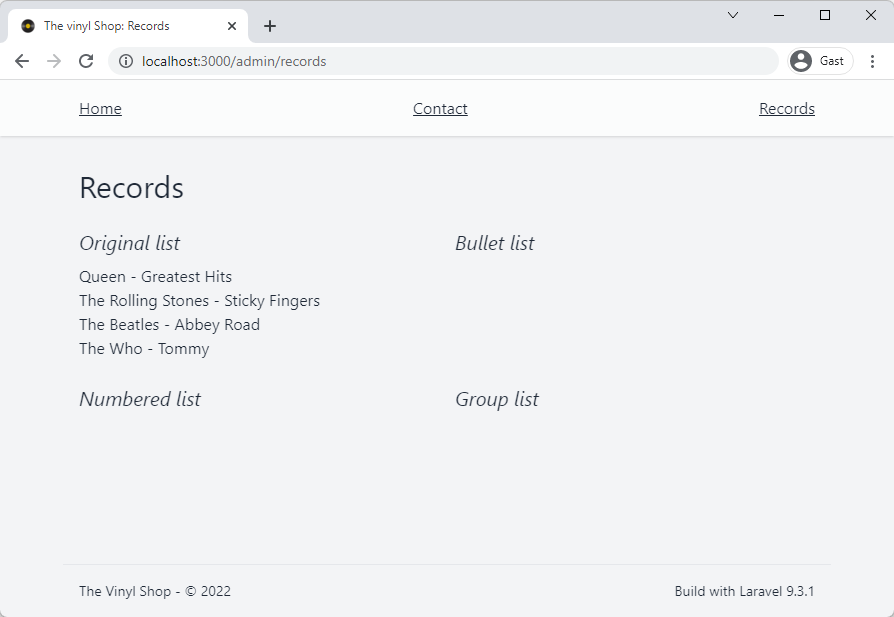
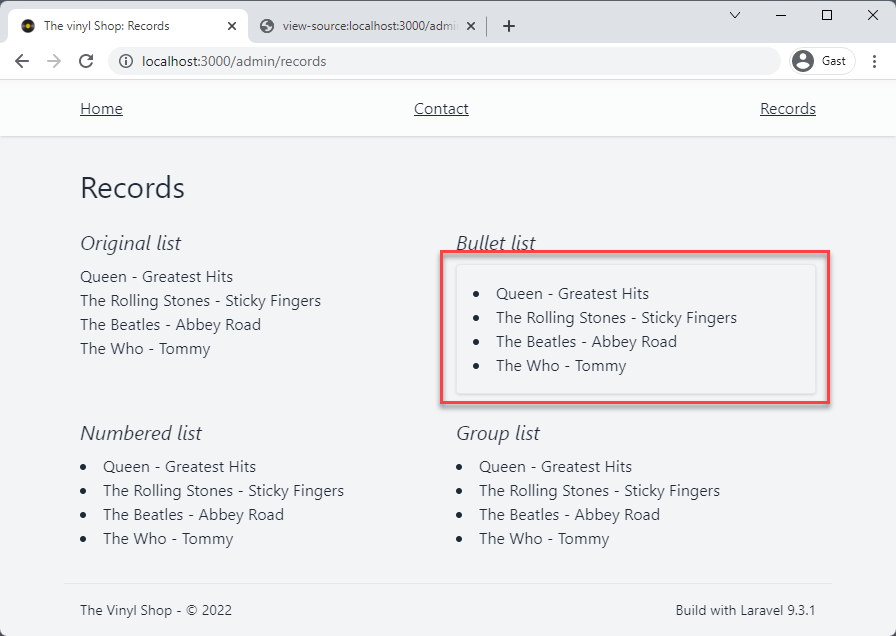
- Open http://vinyl_shop.test/admin/records (opens new window) in the browsers and look at the layout of the records list
- Tailwind by default removes all styles from the unordered list, so we have to add additional classes to bring back the "look" of an unordered list
- We're probably going to use a list multiple times in the application, so we'll have to add the styles over and over again (not really DRY...)
- Such a list is a good candidate to convert to a component
- Create a new list component inside the components folder: resources/views/components/tmk/list.blade.php
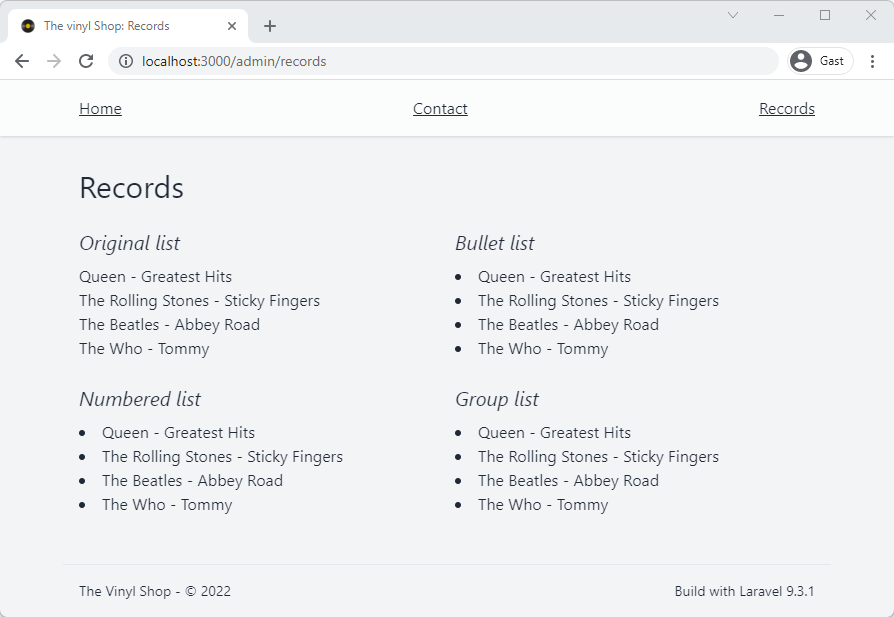
- Open resources/views/admin/records/index.blade.php and add four list variants inside a Tailwind grid
admin/records/index.blade.php
result
<x-vinylshop-layout> <x-slot name="description">Admin records</x-slot> <x-slot name="title">Records</x-slot> <section class="grid sm:grid-cols-2 gap-4"> <div> <h3>Original list</h3> <ul> @foreach ($records as $record) <li>{!! $record !!}</li> @endforeach </ul> </div> <div> <h3>Bullet list</h3> <x-tmk.list> @foreach ($records as $record) <li>{!! $record !!}</li> @endforeach </x-tmk.list> </div> <div> <h3>Numbered list</h3> <x-tmk.list> @foreach ($records as $record) <li>{!! $record !!}</li> @endforeach </x-tmk.list> </div> <div> <h3>Group list</h3> <x-tmk.list> @foreach ($records as $record) <li>{!! $record !!}</li> @endforeach </x-tmk.list> </div> </section> </x-vinylshop-layout>Copied!
1
2
3
4
5
6
7
8
9
10
11
12
13
14
15
16
17
18
19
20
21
22
23
24
25
26
27
28
29
30
31
32
33
34
35
36
37
38
39
2
3
4
5
6
7
8
9
10
11
12
13
14
15
16
17
18
19
20
21
22
23
24
25
26
27
28
29
30
31
32
33
34
35
36
37
38
39
- Add an unordered list with a default slot to the list component
- Style the
ultag as a bullet list
components/tmk/list.blade.php
result
<ul class="list-disc list-inside"> {{ $slot }} </ul>Copied!
1
2
3
2
3
# Pass attributes to the component
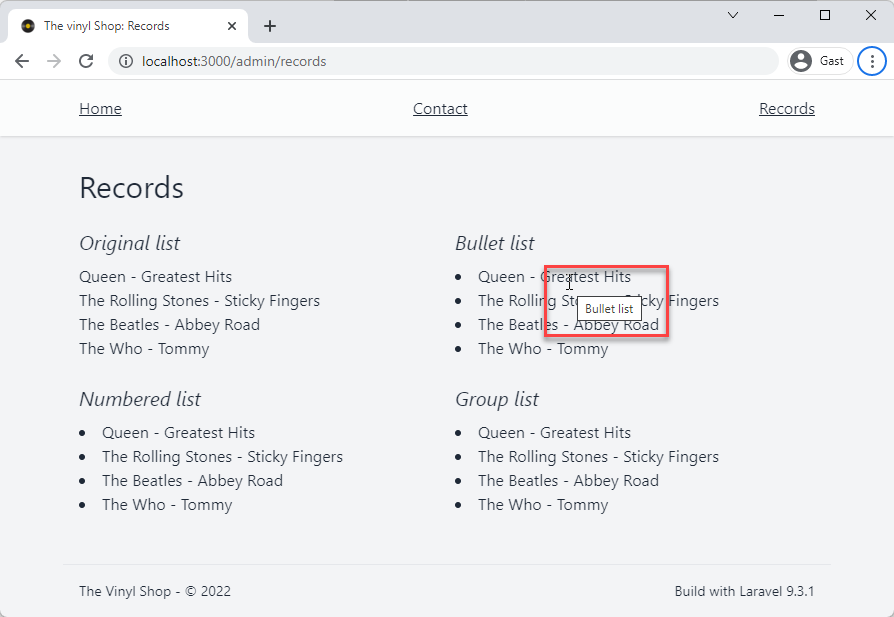
- Sometimes you may need to specify additional HTML attributes (title, class, ...) to the component
- All attributes are available inside the attributes bag, but you have to add it explicitly (with
$attributes) to the component
components/tmk/list.blade.php
admin/records/index.blade.php
result
- Add the 'magic' variable
$attributesto theultag
<ul {{ $attributes }} class="list-disc list-inside"> {{ $slot }} </ul>Copied!
1
2
3
2
3
# Merging the class attribute
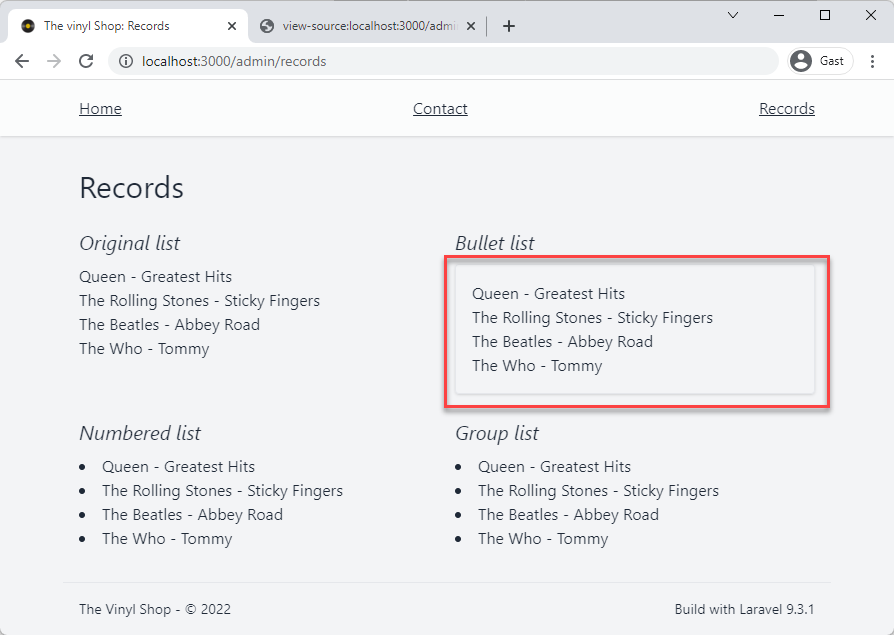
- Most times you specify default classes inside the component and add additional classes on the
classattribute of the component - These classes are not automatically merged with each other!
admin/records/index.blade.php
result
- Add additional classes to the list component
<div> <h3>Bullet list</h3> <x-tmk.list title="Bullet list" class="p-4 border rounded shadow"> @foreach ($records as $record) <li>{!! $record !!}</li> @endforeach </xx-tmk.list> </div>Copied!
1
2
3
4
5
6
7
8
2
3
4
5
6
7
8
- To solve this problem, we have to merge both
classattributes together inside the component
components/tmk/list.blade.php
result
- Add additional classes to the list component
<ul {{ $attributes->merge(['class' => "list-disc list-inside"]) }}> {{ $slot }} </ul>Copied!
1
2
3
2
3
# Pass data properties to the component
- You may specify which attributes should be considered data variables or properties (instead of 'normal' attributes) using the
@propsdirective at the top of the component - Properties also can have default values
- Let's add a
typeproperty to specify the layout of the list - The
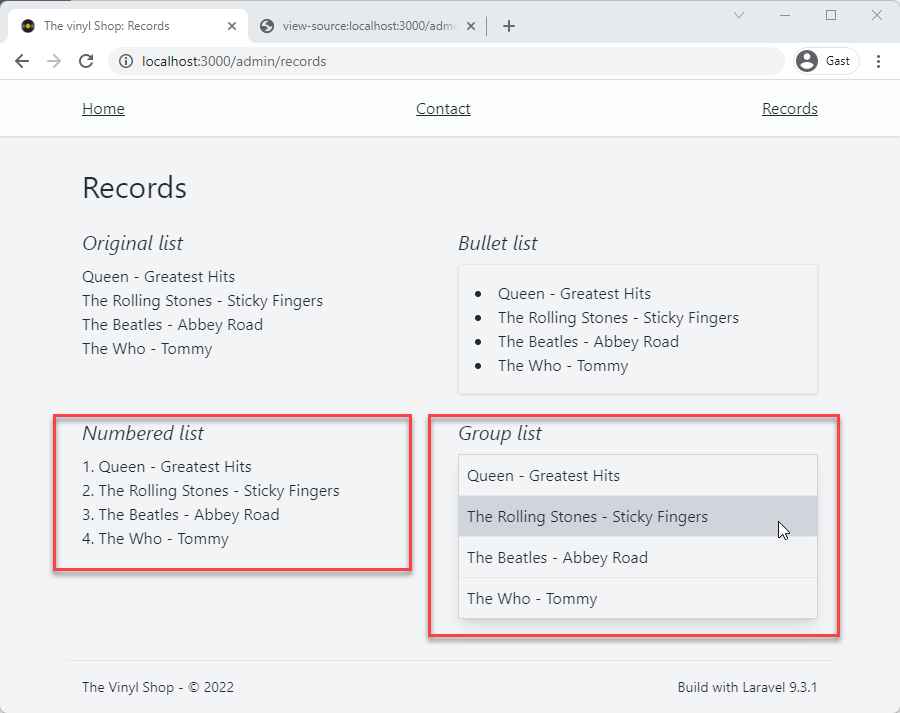
typeproperty can have the value:ul: rendered as a numbered list (default value)ol: rendered as a bullet listgroup: rendered as a grouped list
admin/records/index.blade.php
components/list.blade.php
result
- Line 3 and 11: add the
typeproperty to the last two list components - Line 11 and 13: add some additional classes group list and to the list-items inside the groups list
<div> <h3>Numbered list</h3> <x-tmk.list type="ol"> @foreach ($records as $record) <li>{!! $record !!}</li> @endforeach </x-tmk.list> </div> <div> <h3>Group list</h3> <x-tmk.list type="group" class="shadow-lg"> @foreach ($records as $record) <li class="p-2 hover:bg-gray-300">{!! $record !!}</li> @endforeach </x-tmk.list> </div>Copied!
1
2
3
4
5
6
7
8
9
10
11
12
13
14
15
16
2
3
4
5
6
7
8
9
10
11
12
13
14
15
16
# Section component
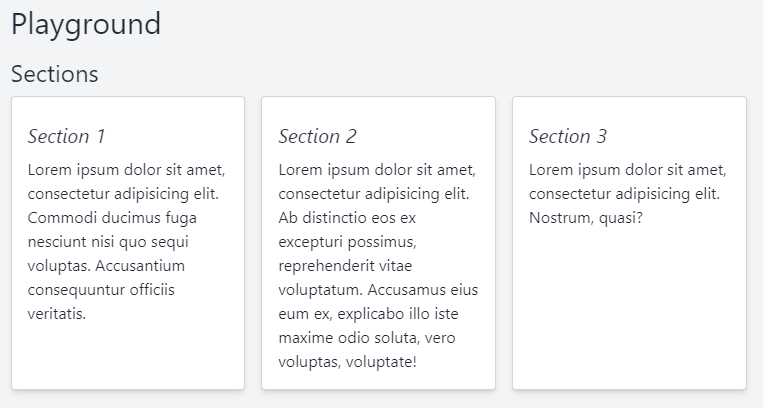
- Let's create a component that renders a
sectionwith a white background, a tiny border and a drop shadow - This component is very simple, because it only contains a
$slotand some basic styling - Create a new section component inside the components folder: resources/views/components/tmk/section.blade.php
- Open resources/views/playground.blade.php and add three sections to the page
resources/views/playground.blade.php
components/tmk/section.blade.php
result
<x-slot name="title">Playground</x-slot> <h2>Sections</h2> <div class="grid grid-cols-3 gap-4"> <x-tmk.section class="col-span-3 md:col-span-1"> <h3>Section 1</h3> <p>Lorem ipsum dolor sit amet, consectetur adipisicing elit. Commodi ducimus fuga nesciunt nisi quo sequi voluptas. Accusantium consequuntur officiis veritatis.</p> </x-tmk.section> <x-tmk.section class="col-span-3 md:col-span-1"> <h3>Section 2</h3> <p>Lorem ipsum dolor sit amet, consectetur adipisicing elit. Ab distinctio eos ex excepturi possimus, reprehenderit vitae voluptatum. Accusamus eius eum ex, explicabo illo iste maxime odio soluta, vero voluptas, voluptate!</p> </x-tmk.section> <x-tmk.section class="col-span-3 md:col-span-1"> <h3>Section 3</h3> <p>Lorem ipsum dolor sit amet, consectetur adipisicing elit. Nostrum, quasi?</p> </x-tmk.section> </div>Copied!
1
2
3
4
5
6
7
8
9
10
11
12
13
14
15
16
17
18
2
3
4
5
6
7
8
9
10
11
12
13
14
15
16
17
18
# Icons
- When we created our project, we also installed the Blade UI kit icons.
- These icons are also built as components and can be used in the same way as all other components.
- Let's add, for example, the Fontawesome Home icon to page
- Open resources/views/playground.blade.php and add four list variants inside a Tailwind grid
resources/views/playground.blade.php
result
- There are four possible ways to use these icons in your application:
- Line 7: use the component
- Line 10: use the default icon component with the name property
- Line 13: use the directive
- Line 16: use the helper
<x-slot name="title">Playground</x-slot> <section class="my-4"> <h2>Blade UI kit Icons</h2> <div class="flex gap-4 p-4 my-4 bg-white rounded border shadow"> <div class="w-6"> <x-fas-home/> </div> <div class="w-6 text-orange-600"> <x-icon name="fas-home"/> </div> <div class="w-6 text-green-600"> @svg('fas-home') </div> <div class="w-6 text-sky-600"> {{ svg('fas-home') }} </div> </div> </section>Copied!
1
2
3
4
5
6
7
8
9
10
11
12
13
14
15
16
17
18
19
2
3
4
5
6
7
8
9
10
11
12
13
14
15
16
17
18
19
REMARK
- Those icons are not visible in the resources/views/components/ folder.
- They are hidden inside the vendor folder.
# Preloader component
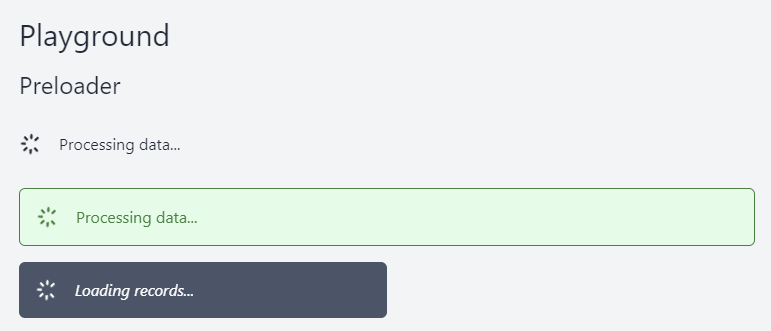
- A preloader is often used to indicate that the data from an external source (API) is being loaded
- This preloader component is a very simple component with only class merging, a spinning icon (opens new window) and a default slot
- Create a new preloader component inside the components folder: resources/views/components/tmk/preloader.blade.php
- Open resources/views/playground.blade.php and add three preloaders to the page
resources/views/playground.blade.php
components/tmk/preloader.blade.php
result
<x-slot name="title">Playground</x-slot> <section class="my-4"> <h2>Preloader</h2> <x-tmk.preloader class="px-0"/> <x-tmk.preloader class="bg-green-100 text-green-700 border border-green-700"/> <x-tmk.preloader class="bg-slate-600 text-white italic w-1/2">Loading records...</x-tmk.preloader> </section>Copied!
1
2
3
4
5
6
7
8
2
3
4
5
6
7
8
# Alert component
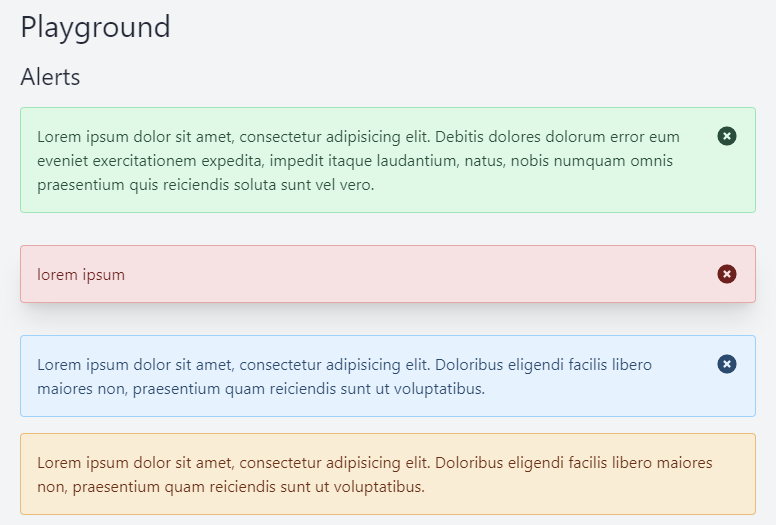
- The alert component has the following properties:
| Property | default | description |
|---|---|---|
type | success | The type (color) of the alert component |
dismissible | true | Whether the component can be dismissed |
closeSelf | 0 | Close the component automatically after x ms |
- Create a new alert component inside the components folder: resources/views/components/tmk/alert.blade.php
- Open playground.blade.php and add four alert variants inside section
# Default component with 'type' property
resources/views/playground.blade.php
components/tmk/alert.blade.php
result
<x-slot name="title">Playground</x-slot> <section class="my-4"> <h2>Alerts</h2> <x-tmk.alert> Lorem ipsum dolor sit amet, consectetur adipisicing elit. Debitis dolores dolorum error eum eveniet exercitationem expedita, impedit itaque laudantium, natus, nobis numquam omnis praesentium quis reiciendis soluta sunt vel vero. </x-tmk.alert> <x-tmk.alert type="danger" class="mt-8 shadow-xl"> lorem ipsum </x-tmk.alert> <x-tmk.alert type="info" class="mt-8"> Lorem ipsum dolor sit amet, consectetur adipisicing elit. Doloribus eligendi facilis libero maiores non, praesentium quam reiciendis sunt ut voluptatibus. </x-tmk.alert> <x-tmk.alert type="warning" dismissible="false" close-self="5000"> Lorem ipsum dolor sit amet, consectetur adipisicing elit. Doloribus eligendi facilis libero maiores non, praesentium quam reiciendis sunt ut voluptatibus. </x-tmk.alert> </section>Copied!
1
2
3
4
5
6
7
8
9
10
11
12
13
14
15
16
17
18
19
20
21
2
3
4
5
6
7
8
9
10
11
12
13
14
15
16
17
18
19
20
21
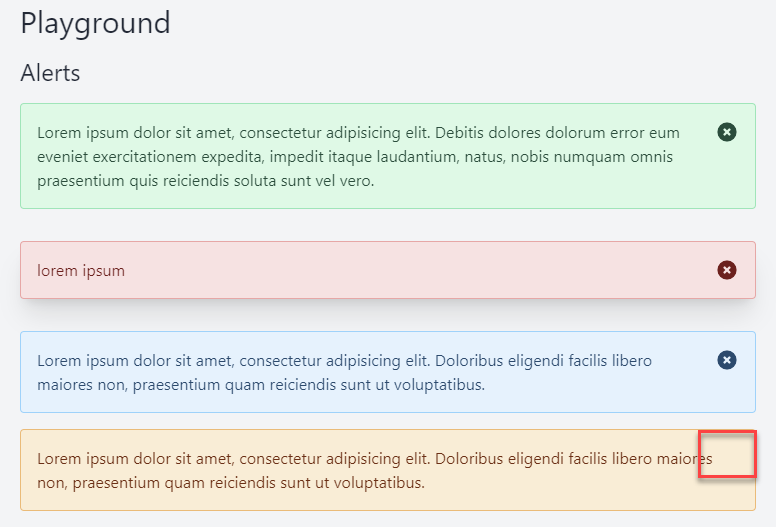
# Add the 'dismissible' functionality
components/tmk/alert.blade.php
result
- Line 8: covert the
dismissibleproperty to a boolean value
The PHPFILTER_VALIDATE_BOOLEAN(opens new window) filter will be used to convert the value to a booleantrue,1,on,yes,y,twill be converted totruefalse,0,off,no,n,fwill be converted tofalse
- Line 27 and 31: the
Xicon will only be visible if thedismissibleproperty istrue - Add some Alpine.JS code (opens new window) to make the
Xicon close the alert- Line 20:
x-data(opens new window) will declare a new Alpine component with a default propertyopenset totrue - Line 21:
x-show(opens new window) defines if the Alpine component is visible or hidden- The component is visible if the property
openistrue - The component is hidden if the property
openisfalse
- The component is visible if the property
- Line 22:
x-transition.duration.300ms(opens new window) transitions the Alpine component in and out using CSS transitions with a duration of300ms - Line 28:
@click(opens new window) (a shorthand forx-on:click) will set theopenproperty tofalseand close the Alpine component
- Line 20:
@props([ 'type' => 'success', 'dismissible' => true, 'closeSelf' => 0 ]) @php $dismissible = filter_var($dismissible, FILTER_VALIDATE_BOOLEAN); $options = [ 'success' => 'text-emerald-900 bg-emerald-100 border-emerald-300', 'danger' => 'text-red-900 bg-red-100 border-red-300', 'info' => 'text-sky-900 bg-sky-100 border-sky-300', 'warning' => 'text-orange-900 bg-orange-100 border-orange-300' ]; $style = $options[$type] ?? $options['success'] @endphp <div {{ $attributes->merge(['class' => "$style flex gap-4 p-4 my-4 rounded border"]) }} x-data="{open: true}" x-show="open" x-transition.duration.300ms > <div class="flex-1"> {{ $slot }} </div> @if($dismissible) <div class="w-6 h-6 flex-none cursor-pointer {{ $style }}" @click="open = false"> <x-heroicon-s-x-circle/> </div> @endif </div>Copied!
1
2
3
4
5
6
7
8
9
10
11
12
13
14
15
16
17
18
19
20
21
22
23
24
25
26
27
28
29
30
31
32
2
3
4
5
6
7
8
9
10
11
12
13
14
15
16
17
18
19
20
21
22
23
24
25
26
27
28
29
30
31
32
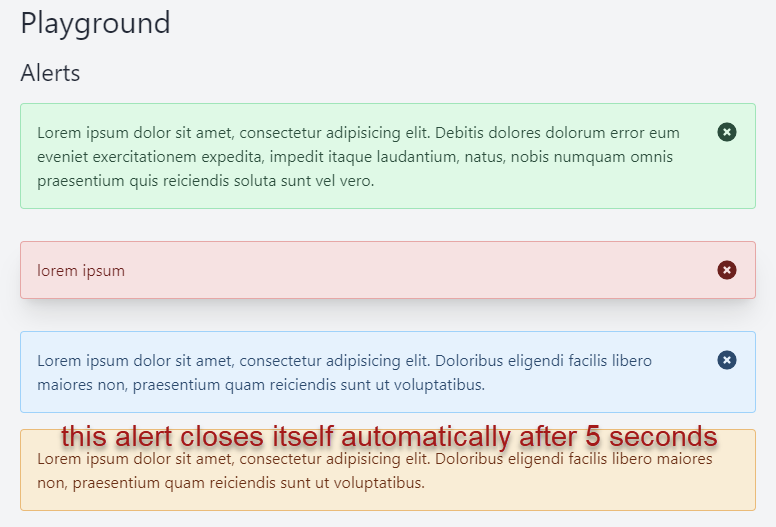
# Add the 'closeSelf' functionality
components/tmk/alert.blade.php
result
- Line 6 - 8: wrap the
x-initAlpine directive in aifstatement to check if thecloseSelfproperty (the time in ms after the component will close itself ) is greater than0 - Line 7:
x-init(opens new window) initializes asetTimeoutfunction that will close the alert aftercloseSelfmilliseconds
<div {{ $attributes->merge(['class' => "$style flex gap-4 p-4 my-4 rounded border"]) }} x-data="{open: true}" x-show="open" x-transition.duration.300ms @if($closeSelf > 0) x-init="setTimeout(() => open = false, {{ $closeSelf }})" @endif > <div class="flex-1"> {{ $slot }} </div> @if($dismissible) <div class="w-6 h-6 flex-none cursor-pointer {{ $style }}" @click="open = false"> <x-heroicon-s-x-circle/> </div> @endif </div>Copied!
1
2
3
4
5
6
7
8
9
10
11
12
13
14
15
16
17
18
2
3
4
5
6
7
8
9
10
11
12
13
14
15
16
17
18
# Make it Livewire compatible
- One of the issues with Livewire is that the component will not always react after the DOM has changed
- When you close the alert and want to open it again, you need to re-initialize the component
- Line 2: this can be solved by adding the
wire:keyLivewire directive with a unique (= random) value to the component
<div wire:key="{{ rand() }}" {{ $attributes->merge(['class' => "$style flex gap-4 p-4 my-4 rounded border"]) }} x-data="{open: true}" x-show="open" x-transition.duration.300ms @if($closeSelf > 0) x-init="setTimeout(() => open = false, {{ $closeSelf }})" @endif > <div class="flex-1"> {{ $slot }} </div> @if($dismissible) <div class="w-6 h-6 flex-none cursor-pointer {{ $style }}" @click="open = false"> <x-heroicon-s-x-circle/> </div> @endif </div>Copied!
1
2
3
4
5
6
7
8
9
10
11
12
13
14
15
16
17
18
19
2
3
4
5
6
7
8
9
10
11
12
13
14
15
16
17
18
19
# Switch component (advanced)
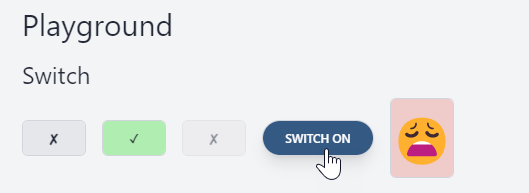
- The switch component is a toggle component that can be used to replace a regular checkbox
- Because the default attributes for a checkbox (
name,value,disabled, etc) must be moved from the root element of the component (label) to the nestedinputtag, you must pass the attributes to the switch component asprops - The switch component has the following properties:
| Property | default | description |
|---|---|---|
checked | false | whether the checkbox is checked or not |
disabled | false | whether the checkbox is disabled or not |
name | null | the name of the checkbox |
value | null | the value of the checkbox |
colorOff | bg-gray-200 | the background color when the checkbox is not checked |
colorOn | bg-green-200 | the background color when the checkbox is checked |
textOff | ✘ | the text inside the switch when the checkbox is not checked |
textOn | ✓ | the text inside the switch when the checkbox is checked |
- Create a new switch component inside the components folder: resources/views/components/tmk/form/switch.blade.php
- Open resources/views/playground.blade.php and add four switch variants to the page
resources/views/playground.blade.php
components/tmk/form/switch.blade.php
result
<x-slot name="title">Playground</x-slot> <section class="my-4"> <h2>Switch</h2> <div class="flex items-center gap-4"> <x-tmk.form.switch/> <x-tmk.form.switch checked color-off="bg-red-200"/> <x-tmk.form.switch disabled/> <x-tmk.form.switch checked name="save" value="Save me" class="text-white shadow-lg rounded-full w-28" color-off="bg-orange-800" color-on="bg-sky-800" text-off="switch off" text-on="switch on"/> <x-tmk.form.switch name="user" value="on" class="h-20 text-5xl" color-off="bg-red-200" color-on="bg-green-500" text-on="😊" text-off="😩"/> </div> </section>Copied!
1
2
3
4
5
6
7
8
9
10
11
12
13
14
15
16
17
18
2
3
4
5
6
7
8
9
10
11
12
13
14
15
16
17
18
# Jetstream components
- Jetstream components are a set of components that are built on top of the Jetstream (opens new window) package that we us later in this course for authentication
- After publishing the component, you can use them in your own Blade files and you can eventually change them to your liking
- Open the terminal and run the command
php artisan vendor:publish --tag=jetstream-views - The Jetstream components are stored inside the
resources/views/vendor/jetstream/componentsdirectory - All the Jetstream components have their own
<x-jet-...>prefix - Jetstream has a lot of form-related components (
input,button, error message, ...), but two of them are missing:- a
selectcomponent - a
textareacomponent
- a
- We create these components ourselves, but based on the
inputcomponent so we have the same look and feel for every element in a form
# Select and textarea component
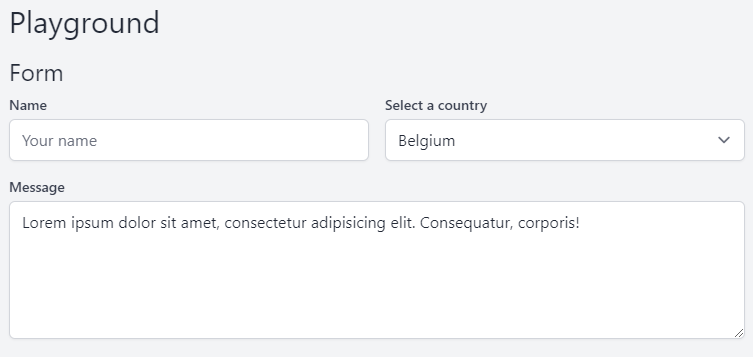
- Create a new select component inside the components' folder: resources/views/components/tmk/form/select.blade.php
- Create a new textarea component inside the components' folder: resources/views/components/tmk/form/textarea.blade.php
- Open resources/views/playground.blade.php and add a form to the page
resources/views/playground.blade.php
components/tmk/form/select.blade.php
components/tmk/form/textarea.blade.php
result
<x-slot name="title">Playground</x-slot> <h2>Form</h2> <form class="grid grid-cols-10 gap-4"> {{-- text input --}} <div class="col-span-10 sm:col-span-5"> <x-jet-label for="name" value="Name"/> <x-jet-input id="name" type="text" class="block mt-1 w-full" placeholder="Your name"/> </div> {{-- select --}} <div class="col-span-10 sm:col-span-5"> <x-jet-label for="country" value="Select a country"/> <x-tmk.form.select id="country" type="text" class="block mt-1 w-full"> <option value="Belgium">Belgium</option> <option value="France">France</option> <option value="Germany">Germany</option> </x-tmk.form.select> </div> {{-- select --}} <div class="col-span-10"> <x-jet-label for="message" value="Message"/> <x-tmk.form.textarea id="message" class="block mt-1 w-full" rows="6" placeholder="Your message"> Lorem ipsum dolor sit amet, consectetur adipisicing elit. Consequatur, corporis! </x-tmk.form.textarea> </div> </form>Copied!
1
2
3
4
5
6
7
8
9
10
11
12
13
14
15
16
17
18
19
20
21
22
23
24
25
26
2
3
4
5
6
7
8
9
10
11
12
13
14
15
16
17
18
19
20
21
22
23
24
25
26
# Customizing the Jetstream button component
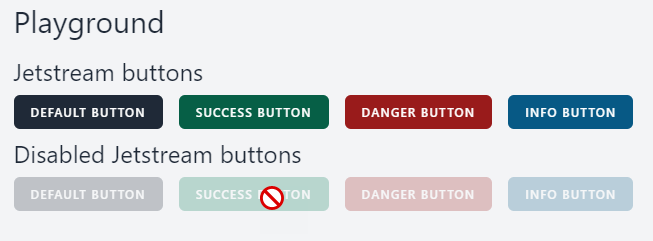
- The button component is a simple component that is used to create a button, but it has only one color
- Let's add a
colorproperty to change the color of the button:color="dark": gray (default)color="success": green (default)color="danger": redcolor="info": blue
- Also add a
disabledproperty to disable the button- If the property exists and is set to
true, thedisabledproperty is added to the<button>tag - If the property doesn't exist or is set to
false, thedisabledproperty is not included on<button>tag
- If the property exists and is set to
- Open resources/views/playground.blade.php and add four buttons to the page
resources/views/playground.blade.php
vendor/jetstream/components/button.blade.php
result
<x-slot name="title">Playground</x-slot> <h2>Jetstream buttons</h2> <section class="flex space-x-4"> <x-jet-button type="button">default button</x-jet-button> <x-jet-button type="button" color="success">success button</x-jet-button> <x-jet-button type="button" color="danger">danger button</x-jet-button> <x-jet-button type="button" color="info">info button</x-jet-button> </section> <h2>Disabled Jetstream buttons</h2> <section class="flex space-x-4"> <x-jet-button type="button" disabled>default button</x-jet-button> <x-jet-button type="button" color="success" disabled>success button</x-jet-button> <x-jet-button type="button" color="danger" disabled>danger button</x-jet-button> <x-jet-button type="button" color="info" disabled>info button</x-jet-button> </section>Copied!
1
2
3
4
5
6
7
8
9
10
11
12
13
14
15
16
17
2
3
4
5
6
7
8
9
10
11
12
13
14
15
16
17
# Logo component
- Jetstream use three different logos for the admin panel
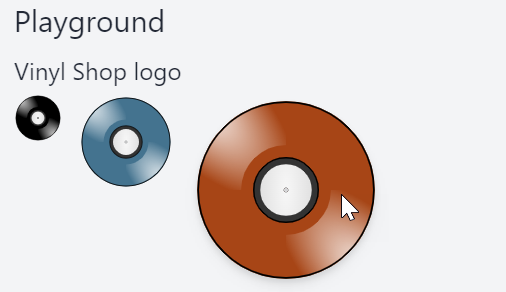
- Let's create a new logo component that we will use on the navigation bar and on the admin panel
- Create a new logo component inside the components folder: resources/views/components/tmk/logo.blade.php
- Open resources/views/playground.blade.php and add three logos to the page
resources/views/playground.blade.php
components/tmk/logo.blade.php
result
<x-slot name="title">Playground</x-slot> <h2>Vinyl Shop logo</h2> <section class="flex items-start space-x-4"> <x-tmk.logo class="w-12"/> <x-tmk.logo class="w-24 fill-cyan-700"/> <x-tmk.logo class="w-40 fill-neutral-600 hover:w-48 hover:fill-orange-700 hover:drop-shadow-lg transition"/> </section>Copied!
1
2
3
4
5
6
7
8
2
3
4
5
6
7
8
# Passing dynamic data to components
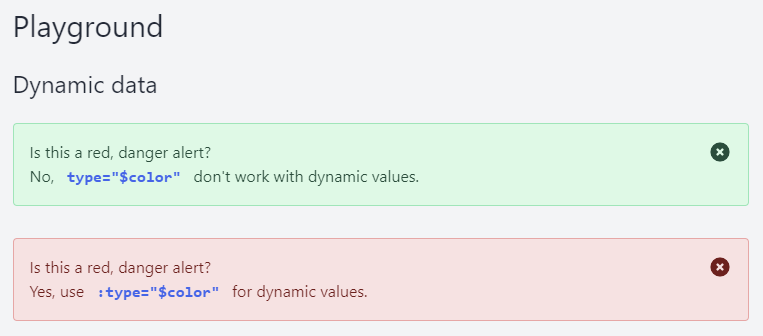
- Hard coded, string values may be passed to the component using simple HTML attribute strings
- You can also pass a dynamic values to the component, but than you have to prefix the attribute with
: - Open resources/views/playground.blade.php and add two alerts to the page
resources/views/playground.blade.php
result
<x-slot name="title">Playground</x-slot> <section class="flex flex-col"> <h2>Dynamic data</h2> @php $color = 'danger'; @endphp <x-tmk.alert type="$color"> Is this a red, danger alert?<br> No, <code class="px-2 text-blue-600 font-black">type="$color"</code> don't work with dynamic values. </x-tmk.alert> <x-tmk.alert :type="$color"> Is this a red, danger alert?<br> Yes, use <code class="px-2 text-blue-600 font-black">:type="$color"</code> for dynamic values. </x-tmk.alert> </section>Copied!
1
2
3
4
5
6
7
8
9
10
11
12
13
14
15
16
17
18
2
3
4
5
6
7
8
9
10
11
12
13
14
15
16
17
18
