Line 7 - 9: define the validation rules in the protected $rules array
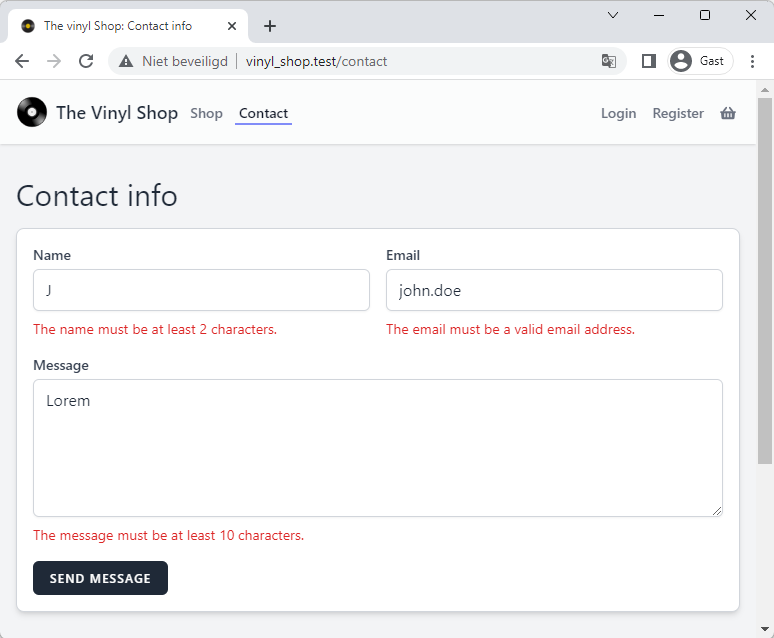
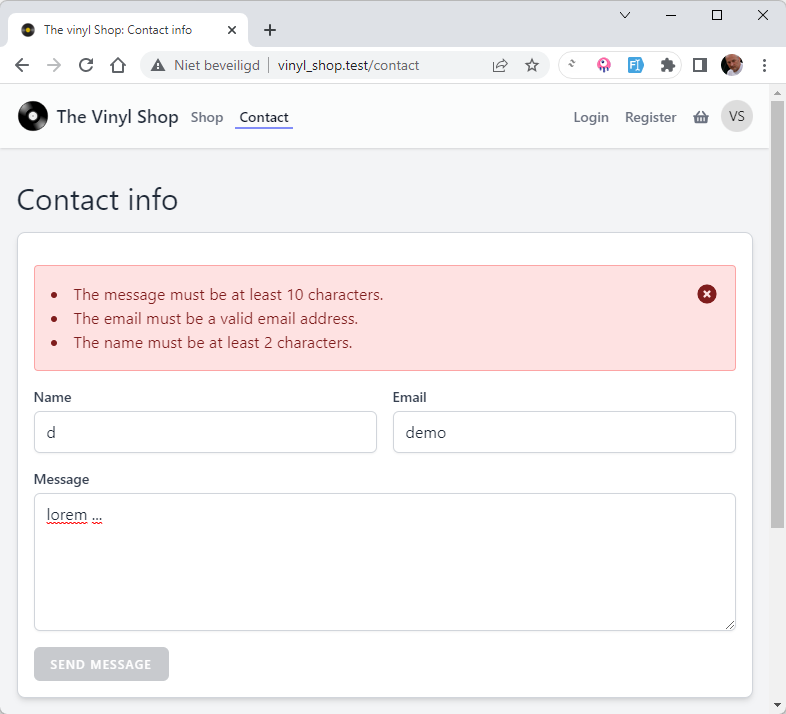
The name field is required and must be at least 2 characters long
The email field is required and must be a valid email address
The message field is required and must be at least 10 characters long
Line 15: the updated() hook checks each updated input field individually against his validation rules
Line 22: you cannot pass this line until the validation is successful
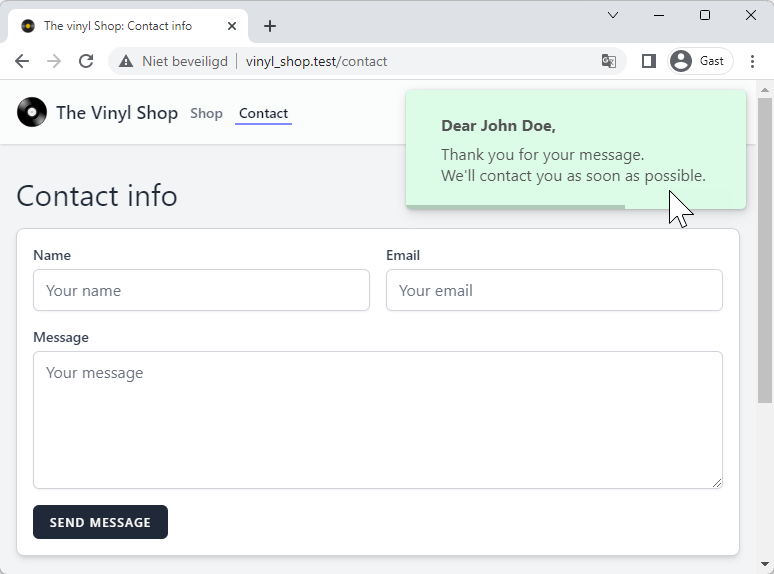
Line 27 - 31: show a success message when the email is sent (send the actual mail will be covered soon)
Line 34: reset all public properties to their initial state
classContactFormextendsComponent{...// validation rulesprotected$rules=['name'=>'required|min:2','email'=>'required|email','message'=>'required|min:10',];// real-time validationpublicfunctionupdated($propertyName,$propertyValue){$this->validateOnly($propertyName);}// send emailpublicfunctionsendEmail(){// validate the whole request before sending the email$validatedData=$this->validate();// send email// show a success toast$this->dispatchBrowserEvent('swal:toast',['background'=>'success','html'=>"<p class='font-bold mb-2'>Dear $this->name,</p>
<p>Thank you for your message.<br>We'll contact you as soon as possible.</p>",]);// reset all public properties$this->reset();}publicfunctionrender(){...}}
Remember that we modified the Jetstream button component a few chapters ago
We added a disabled and the color attributes to the component
We can use the disabled attribute on the submit button to disable the button when the validation is not successful
Line 7: add a public property $can_submit with a default value of false
Line 15: set the $can_submit property to false if the full validation is successful
Line 17 - 18: set the $can_submit property to true if the name, email and message fields are not empty REMARK: the if() statement contains only rough validation (fields can not be empty). We don't check the length of the input fields, but that's enough for this example
classContactFormextendsComponent{// public propertiespublic$name;public$email;public$message;public$can_submit=false;// validation rulesprotected$rules=[...];// real-time validationpublicfunctionupdated($propertyName,$propertyValue){$this->can_submit=false;$this->validateOnly($propertyName);if($this->name&&$this->email&&$this->contact&&$this->message)$this->can_submit=true;}publicfunctionsendEmail(){...}publicfunctionrender(){...}}
The mail is already set up for you in the .env file
The .env file contains the following settings for the mail service:
Line 2: replace mailhog with localhost
Line 7: replace "hello@example.com" with your mailadres e.g. "info@vinyl_shop.test"
MAIL_MAILER=smtp
MAIL_HOST=localhost # replace 'mailhog' with 'localhost'MAIL_PORT=1025MAIL_USERNAME=null
MAIL_PASSWORD=null
MAIL_ENCRYPTION=null
MAIL_FROM_ADDRESS="info@vinyl_shop.test"# replace "hello@example.com" with your mailadres e.g. "info@vinyl_shop.test"MAIL_FROM_NAME="${APP_NAME}"
1 2 3 4 5 6 7 8
WARNINGS
If your variable contains spaces, surround it with quotes. E.g. MAIL_FROM_NAME="John Doe"
If you want a REAL email address to test certain functionalities, use Mailinator(opens new window) e.g. john.doe@mailinator.com.
Emails sent to Mailinator are public but temporary and will disappear after a few hours.
In Laravel, each type of email sent by your application is represented as a mailable(opens new window) class
Create a new mailable class with an associated view with the command: php artisan make:mail ContactMail --markdown=emails.contact-mail
The ContactMail mailable class is located in the app/Mail directory
The contact-mail view is located in the resources/views/emails directory
The --markdown option will create a markdown based view(opens new window)
(Besides a Markdown-based mail template, used in this site, you can also opt for HTML or text-based templates for the mail)
Send an email inside the sendMail() method from our ContactForm component and open MailHog to see the result
Line 8: make a new variable $template of the ContactMail mailable class
Line 9: the variable $to contains the email address (first parameter) and the name (second parameter) of the person who receives the email
(Import the class for the new Address: use Illuminate\Mail\Mailables\Address;!)
Line 10: add the recipient using the to() method (on the Mail facade)
Line 11: send the mail using the send() method with $template as parameter
// send emailpublicfunctionsendEmail(){// validate the whole request before sending the email$validatedData=$this->validate();// send email$template=newContactMail();$to=newAddress($this->email,$this->name);
Mail::to($to)->send($template);// show a success toast$this->dispatchBrowserEvent('swal:toast',['background'=>'success','html'=>"<p class='font-bold mb-2'>Dear $this->name,</p>
<p>Thank you for your message.<br>We'll contact you as soon as possible.</p>",]);// reset all public properties$this->reset();}
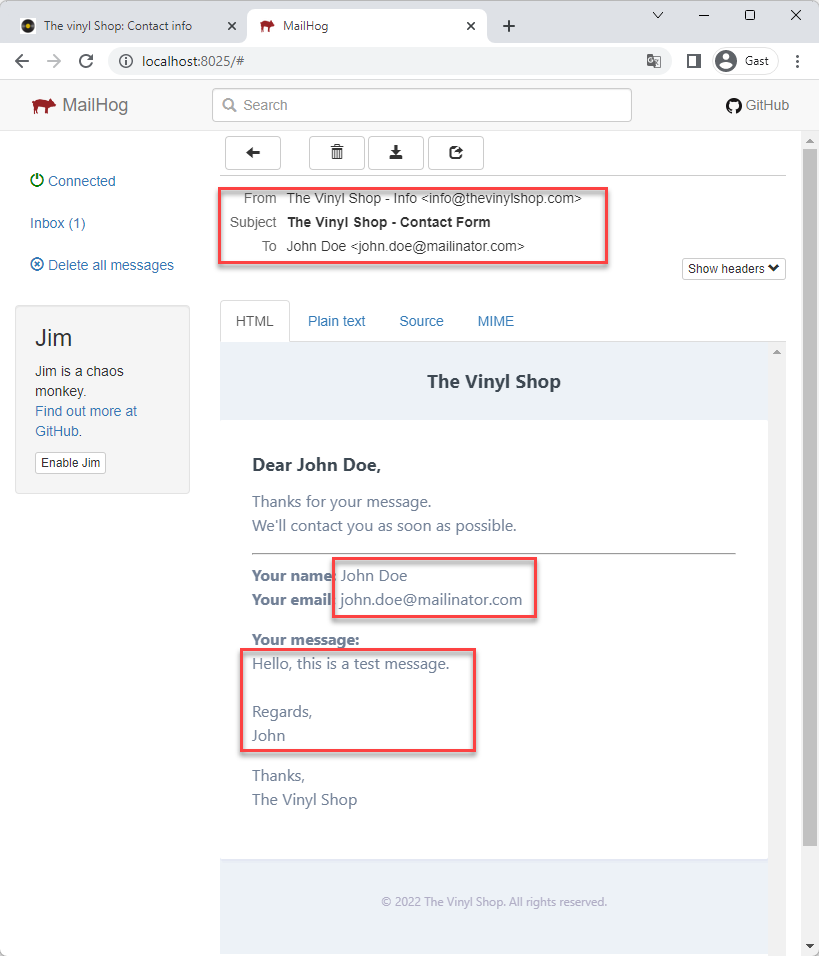
Submit a form and check if the mail is in your MailHog inbox
For now, a default mail is send with:
the From address The Vinyl Shop <info@vinyl_shop.test> (as specified in the .env file)
the Subject is the name of the mailable class ContactMail
the To address is the email address you specified in the component
the Body is the default content markdown template
REMARKS
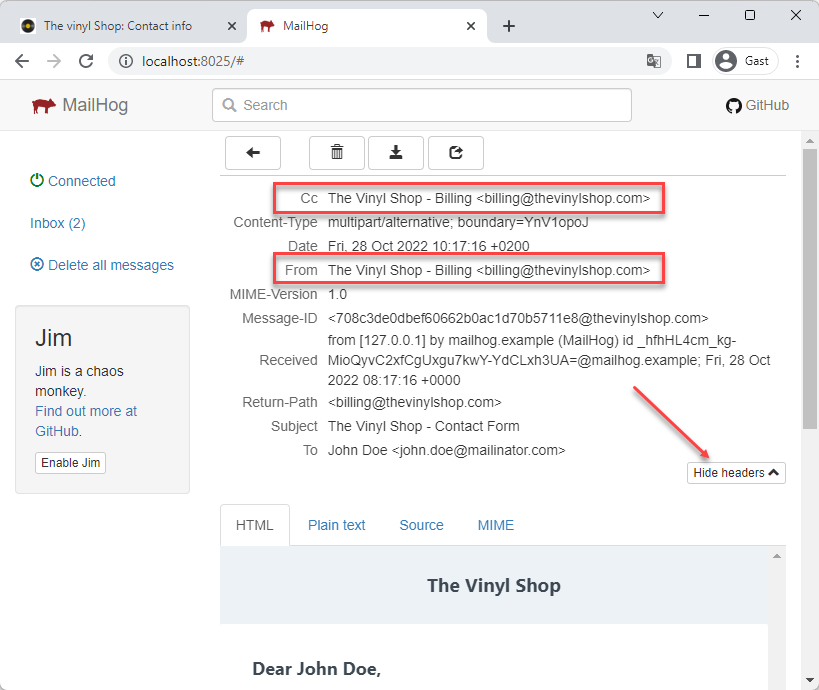
You are not limited to theto() recipients. You can also add the cc() and bcc() recipients
All these methodes can handle multiple recipients with an array of recipients
The second parameter (the name) of the new Address() method is optional
If you don't need the name of the recipient, you can omit the new Address() and just pass the email address as a string,
e.g. $to = 'john.doe@exmpale.com'; is the same as $to = new Address('john.doe@exmpale.com');
Example:
// send email$template=newContactMail();$to_1=newAddress($this->email,$this->name);// email + name$to_2=newAddress('user2@example.com');// email only$to_3='user3@example.com';// email only (same as above)
Mail::to([$to_1,$to_2,$to_3])->cc(['user3@example.com','user4@example.com'])->bcc(['user5@example.com','user6@example.com'])->send($template);
1 2 3 4 5 6 7 8 9
All other mail settings (subject, body, from, replayTo, ...) can be configured in the ContactMail class
# Pass data to the mailable and update the mail template
Add the data you want to use in the email as parameters to new ContactMail() to inject it into the constructor of mailable class and
make it available in the mail template
ContactForm component: add an array with the data you want to inject into the constructor of the mailable (and use in the mail template)
ContactMail mailable: add a public property (e.g. $data) and assign the injected data via te constructor to it
Update the Contact view and use the data from the mailable in the mail template
fromName and fromEmail will be used to override the default from address in the mailable class
subject will be used to override the default subject in the mailable class
name, email and message will be used in the body of the email
Line 8 and 10: read the injected data from the constructor and assign it to the $data property
Line 17: replace the default from address with the injected $this->data['fromName'] and $this->data['fromEmail']
Line 18: replace the default subject with the injected $this->data['subject']
Line 26: is the path to the mail template
(The other data from the $data property will be used in the mail template)
classContactMailextendsMailable{useQueueable, SerializesModels;public$data;/** Create a new message instance. ...*/publicfunction__construct($data){$this->data=$data;}/** Get the message envelope. ...*/publicfunctionenvelope(){returnnewEnvelope(
from:newAddress($this->data['fromEmail'],$this->data['fromName']),
subject:$this->data['subject'],);}/** Get the message content definition. ...*/publicfunctioncontent(){returnnewContent(
markdown:'emails.contact-mail',);}/** Get the attachments for the message. ...*/publicfunctionattachments(){return[];}}