# Authentication
- Laravel makes implementing authentication (opens new window) very simple as almost everything is configured for you out of the box
- We already installed the Laravel Jetstream starterkit (opens new window) which comes with a full authentication scaffolding ready to use
- The authentication configuration file is located at config/auth.php and contains several well documented options for tweaking the behavior of the authentication services
# Authentication Quickstart
# Routing
- Laravel provides a quick way to list all routes using one simple command:
php artisan route:list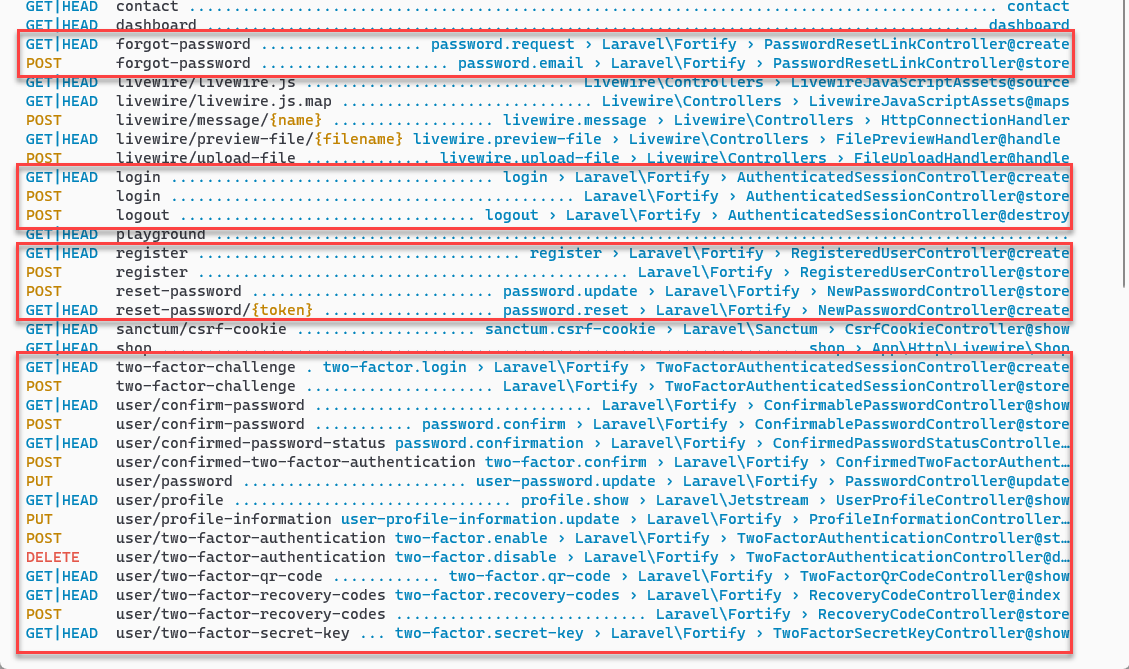
- The routes that we need for our navigation are:
| Method | URI | Route name | Name in our navigation |
|---|---|---|---|
| GET | login | login | Login |
| GET | register | register | Register |
| POST | logout | logout | Logout |
| GET | dashboard | dashboard | Dashboard |
| GET | user/profile | profile.show | Update Password |
- Only the login and register routes are already defined in our navigation component
# Public views
- Jetstream added 7 (unprotected) view files to the resources/views/auth folder
(login, register, verify-email, forgot-password, reset-password, confirm-password and two-factor-challenge) - All these views are based on the
<x-guest-layout>layout and have no navigation
# Test the full auth cycle
# Login
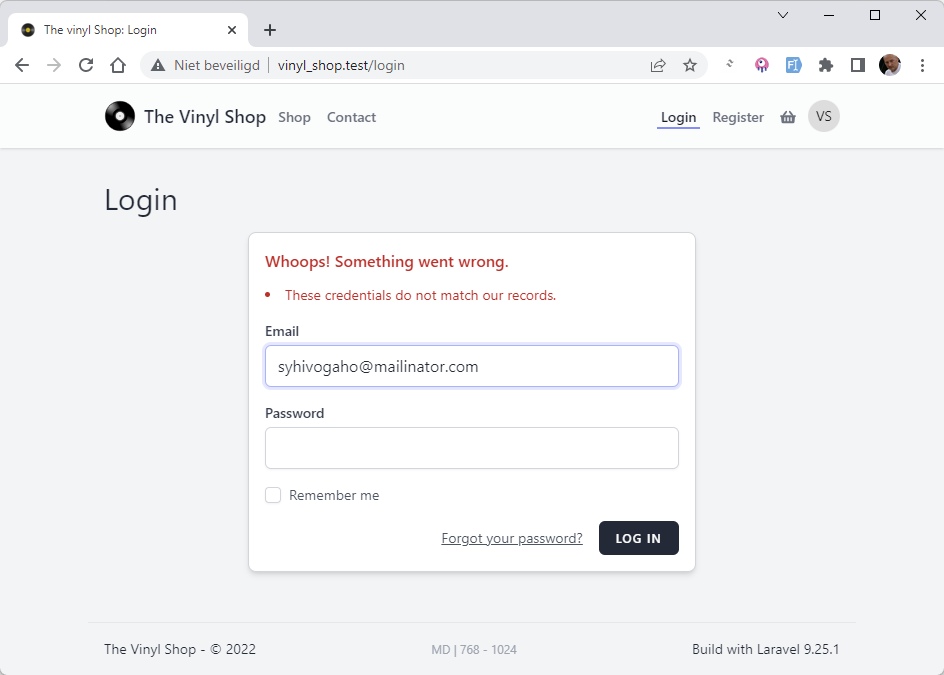
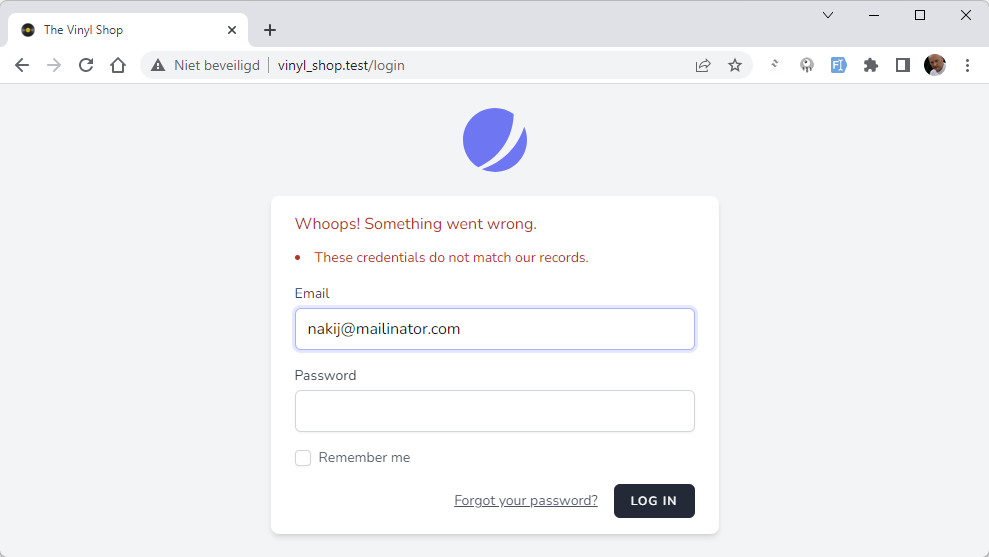
- Click on Login and use one of the users we created earlier
incorrect credentials
good credentials
# Forgot password
- Logout again and click on Login
- Click on Forgot your password?
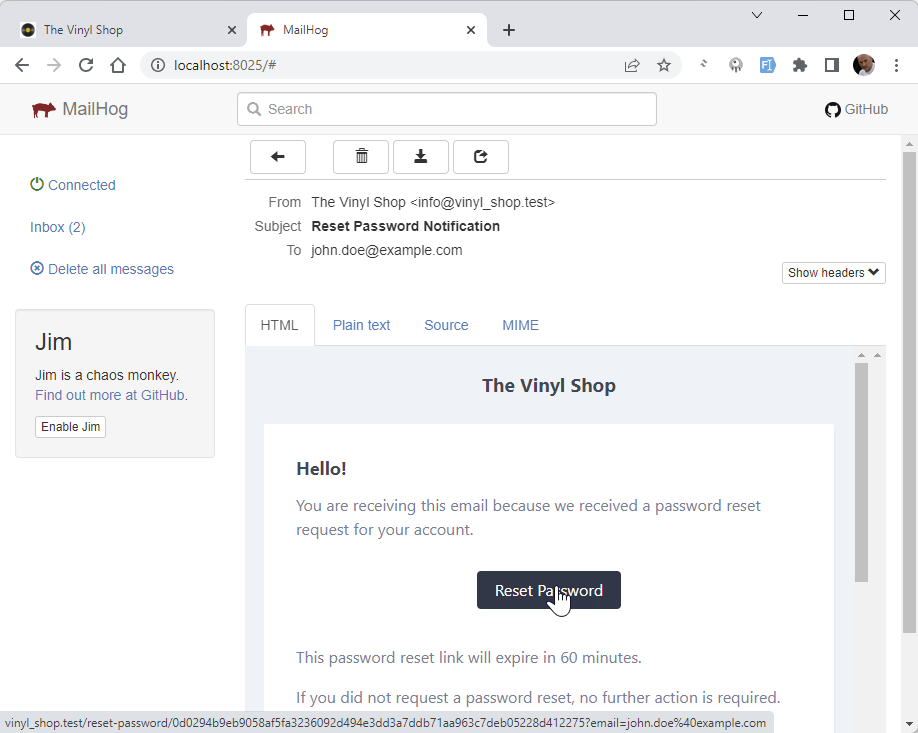
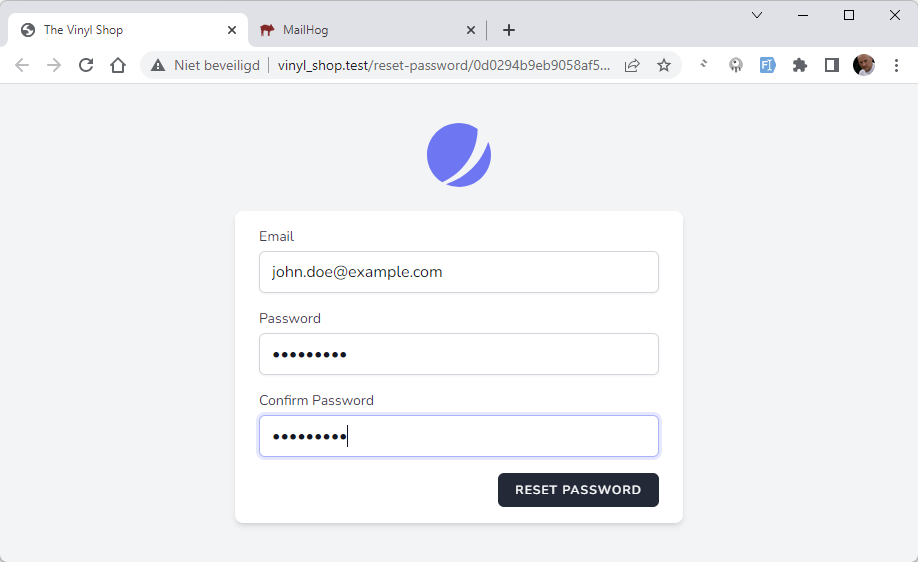
- Check your email and click on the link in the email
REMARK
First, check the mail configuration in the .env file
step 1
step 2
step 3
step 4
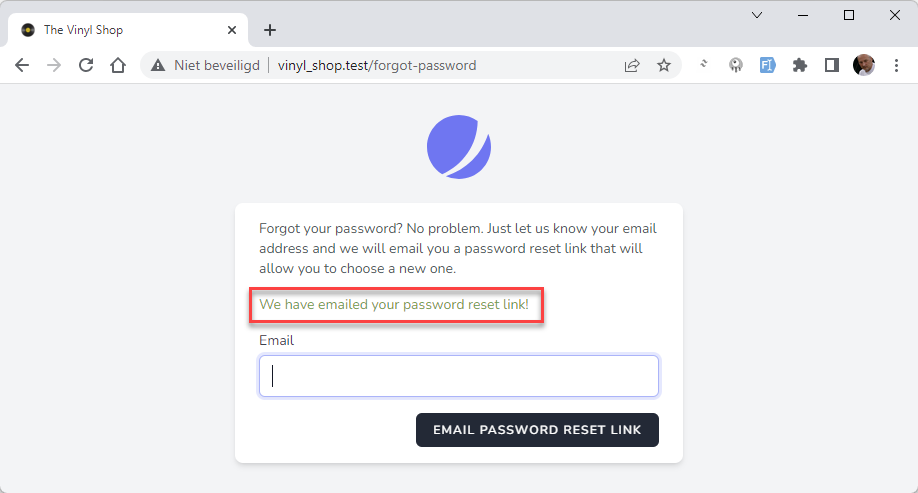
- Enter the email address of one of the users, e.g. john.doe@example.com and click on Email Password Reset Link
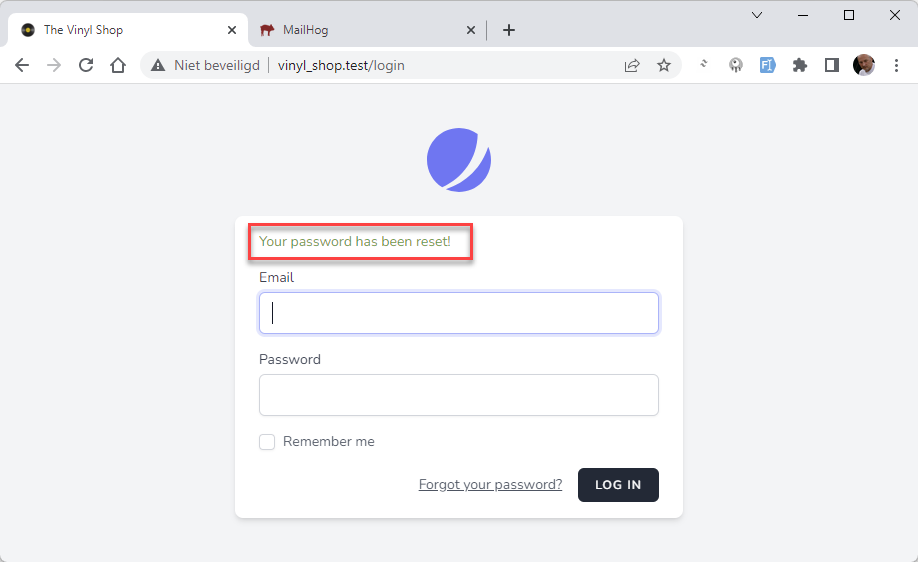
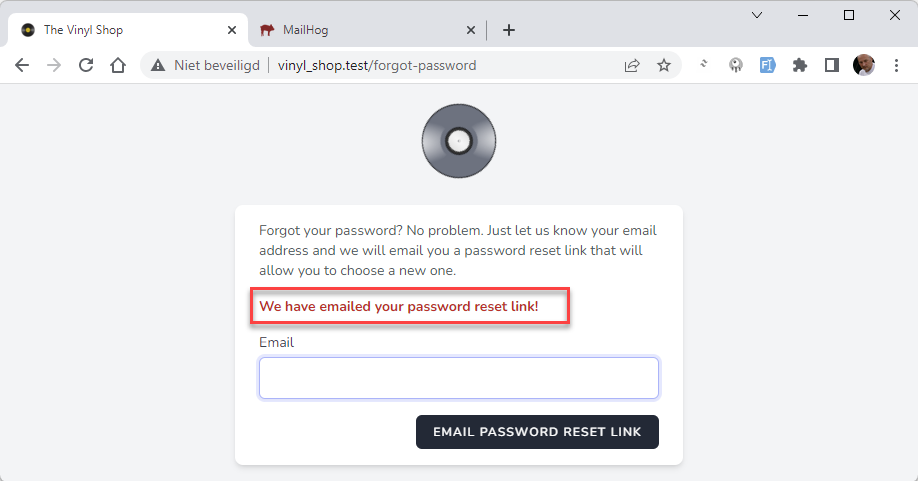
- A message is shown that an email has been sent
# Register
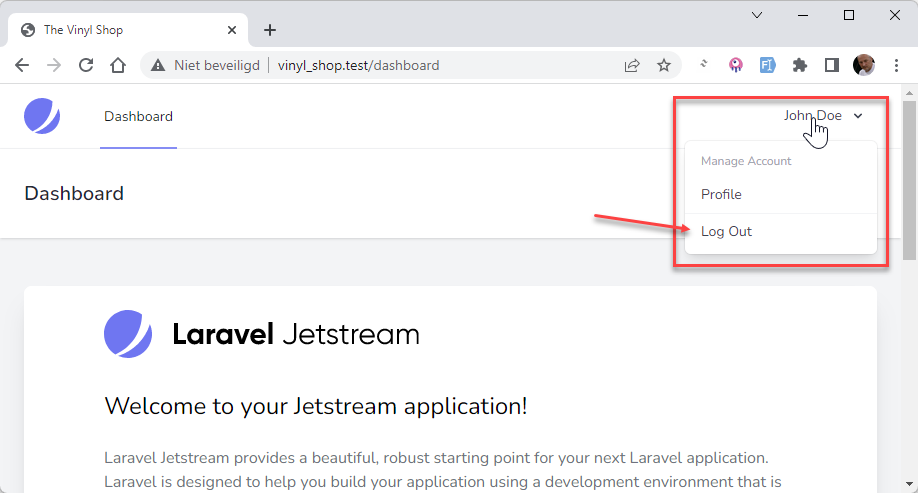
- Click on Logout
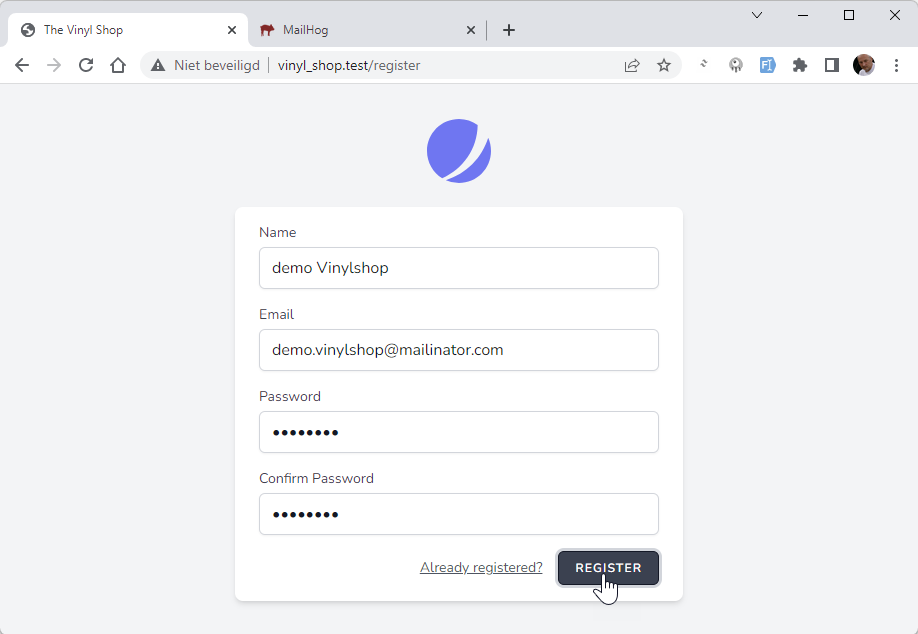
- Click in the navigation on Register
- Register a new user, e.g. demo_vinylshop@mailinator.com with password demo1234
(The password must be at least 8 characters and must be entered twice ) - The user will be created in the database (open phpMyAdmin and check the table users) and is immediately logged in
REMARK
In the authentication cycle illustrated above only one error occurred. Obviously, your Laravel application will also react "correctly" in the following scenarios:
- Login with an unknown email or with a wrong password
- When registering or resetting the password, the entered password is too short or the two passwords are not equal
- A password reset link is requested for a non-existing user
- ...
# Update the public views
- Let's do some customization of the auth views
- Replace the Jetstream logo with our own logo
- Change the light-green color of the information messages to a more distinctive color
- Change the layout to our own layout
# Replace the Jetstream logo with our own logo
- Open one of the auth views, e.g. resources/views/auth/forgot-password.blade.php
Crtl + Clickon<x-jet-authentication-card-logo />to open the file
resources/views/vendor/jetstream/components/authentication-card-logo.blade.php- Comment out the original code and place the code for our own logo above it
<x-tmk.logo class="w-20 h-20 fill-current text-gray-500 animate-spin" /> {{-- <a href="/"> <svg class="w-16 h-16" ... ></svg> </a> --}}Copied!
1
2
3
4
5
6
2
3
4
5
6
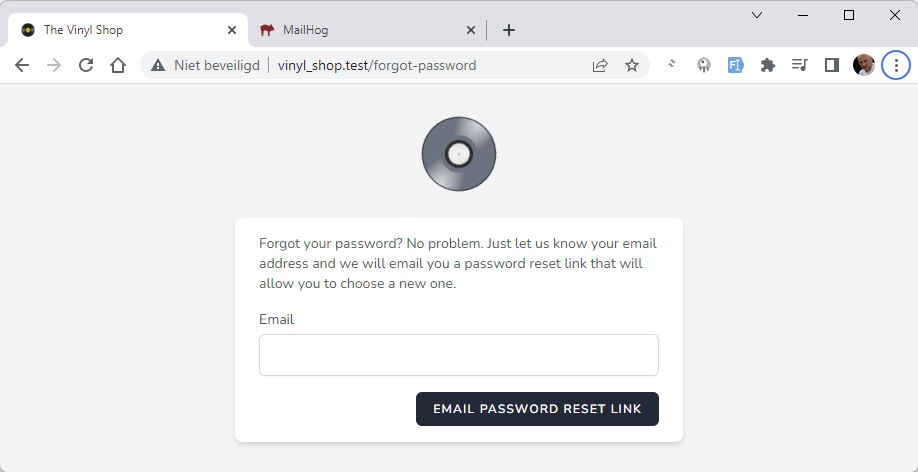
Log out!
- You have to log out to get to the
forgot-passwordpage.
# Change color of information messages
- Open the files:
- resources/views/auth/forgot-password.blade.php
- resources/views/auth/login.blade.php
- Find the div around
session('status)and change some classes:font-mediumtofont-boldtext-green-600totext-red-600
@if (session('status')) <div class="mb-4 font-bold text-sm text-red-600"> {{ session('status') }} </div> @endifCopied!
1
2
3
4
5
2
3
4
5
# Replace the template layout (optional)
- It's possible to replace this layout with our
<x-vinylshop-layout>layout, but for simplicity we stick to the default layout
REMARKS
- You don't have to change the layout in this course, but the modification below is just to illustrate how it works and can be useful in your future projects
- To avoid breaking something, always place the original code in comment and copy the parts we need from the original code to our own template
{{-- <x-guest-layout> <x-jet-authentication-card> ... </x-jet-authentication-card> </x-guest-layout> --}}Copied!
1
2
3
4
5
2
3
4
5
- All public auth views are based on the
<x-guest-layout>layout - Let's customize this page by replacing the
<x-guest-layout>template with our<x-vinylshop-layout>template - Open the resources/views/auth/login.blade.php file and set the original code in comment
step 1
step 2
result
- Create a basic scaffolding, based on our
<x-vinylshop-layout>template
<x-vinylshop-layout> <x-slot name="description">login</x-slot> <x-slot name="title">Login</x-slot> <x-tmk.section class="grid grid-cols-1 max-w-md m-auto"> {{-- show validation errors --}} {{-- login form --}} </x-tmk.section> </x-vinylshop-layout>Copied!
1
2
3
4
5
6
7
8
9
10
11
2
3
4
5
6
7
8
9
10
11
# Retrieving the authenticated user
- You may access the authenticated user via the
auth()helper function or via theAuthfacade
- For example, the code below can be added to a controller of choice (you don't need to do this -> we will use/illustrate this further on in our navigation component and our admin middleware)
// Get the currently authenticated user $user = auth()->user(); // or Auth::user(); // Get one attribute off the currently authenticated user (e.g. name, email, id, ...) $name = auth()->user()->name; // or Auth::user()->name; // Shortcut for the currently authenticated user's id $id = auth()->id(); // or Auth::id();Copied!
1
2
3
4
5
6
7
8
2
3
4
5
6
7
8
# Authentication directives and helpers inside Blade
- The
@authand@guestBlade directives may be used to quickly determine if the current user is authenticated or is a guest - You can also use the
auth()helper function orAuthfacade (see above) inside a Blade template
@guest // only visible for guests and NOT for authenticated users (= not logged in) @endguest @auth // only visible for authenticated users and NOT for guests (= logged in) @endauthCopied!
1
2
3
4
5
6
7
2
3
4
5
6
7
# Update the navigation component
- Open the resources/views/components/layout/nav.blade.php file and add the
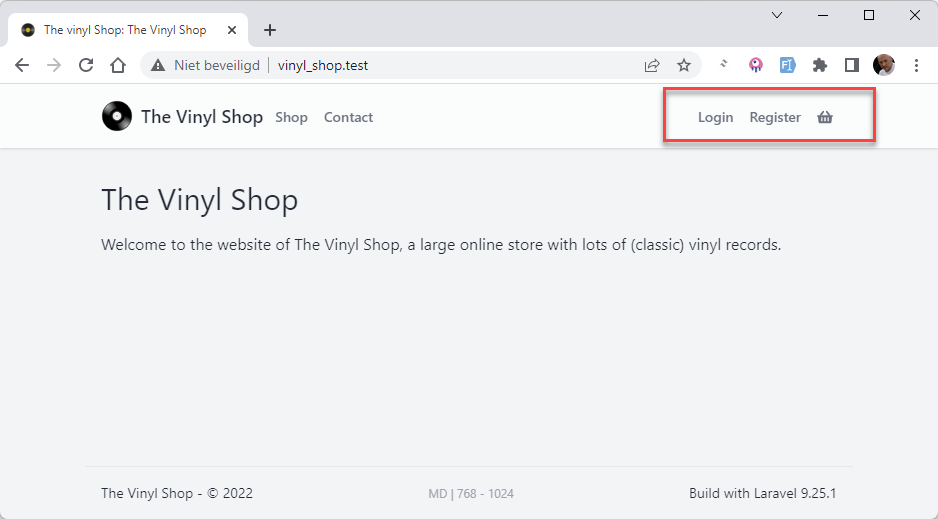
@authand@guestdirectives- If the user is not logged in, the navigation component should:
- show the Login and Register links
- hide the dropdown menu on te right
- If the user is logged in, the navigation component should:
- show the dropdown menu on the right
- hide the Login and Register links
- If the user is not logged in, the navigation component should:
nav.blade.php
user is not logged in
user is logged in
{{-- right navigation --}} <div class="relative flex items-center space-x-2"> @guest <x-jet-nav-link href="{{ route('login') }}" :active="request()->routeIs('login')"> Login </x-jet-nav-link> <x-jet-nav-link href="{{ route('register') }}" :active="request()->routeIs('register')"> Register </x-jet-nav-link> @endguest <x-jet-nav-link href="{{ route('home') }}" :active="request()->routeIs('basket')"> <x-fas-shopping-basket class="w-4 h-4"/> </x-jet-nav-link> {{-- dropdown navigation--}} @auth <x-jet-dropdown align="right" width="48"> {{-- avatar --}} <x-slot name="trigger"> ... </x-slot> <x-slot name="content"> {{-- all users --}} ... {{-- admins only --}} ... </x-slot> </x-jet-dropdown> @endauth </div>Copied!
1
2
3
4
5
6
7
8
9
10
11
12
13
14
15
16
17
18
19
20
21
22
23
24
25
26
27
28
29
2
3
4
5
6
7
8
9
10
11
12
13
14
15
16
17
18
19
20
21
22
23
24
25
26
27
28
29
# Dashboard and profile pages
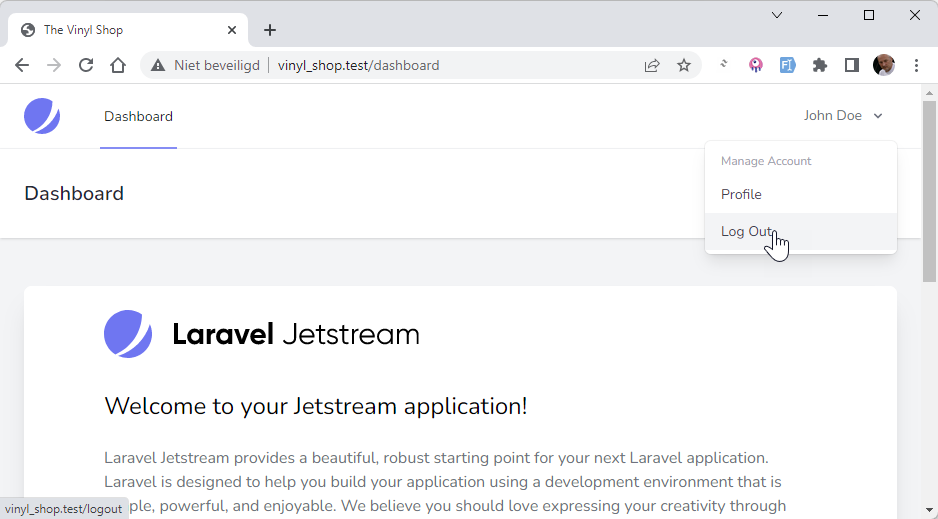
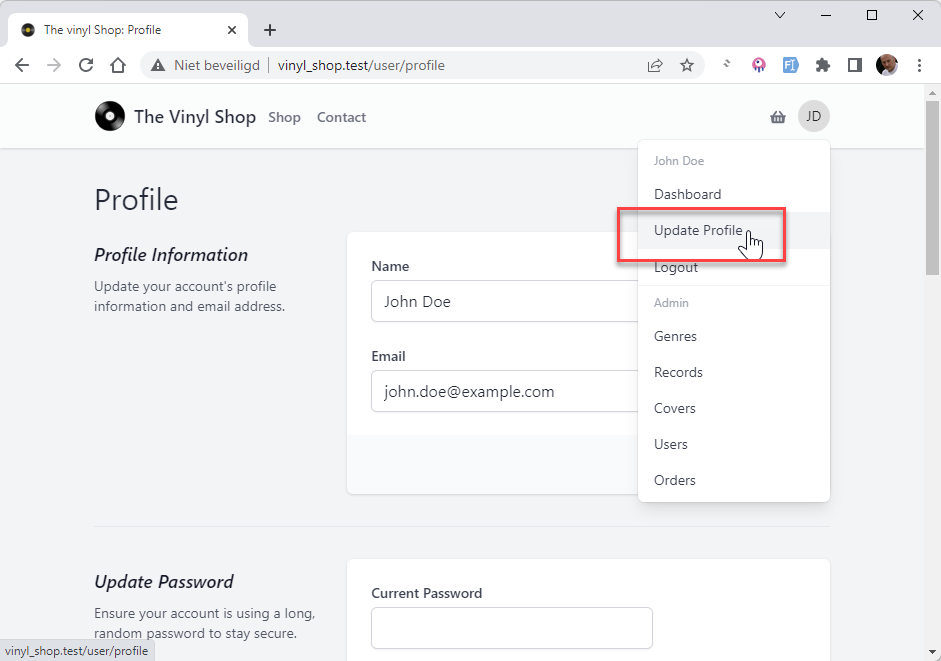
- A logged-in user can access the dashboard and profile pages but with the default Jetstream
<x-app-layout>layout component
# Update the links in the navigation component
- Open the resources/views/components/layout/nav.blade.php file:
- Line 6: replace
Vinyl+Shopat the end of thehrefattribute withurlencode(auth()->user()->name)- the
urlencode()PHP function (opens new window) converts the user's name to a slug (e.g.John Doe->john+doe) - this encoded string will be used to generate an avatar image (opens new window), based on the initials of the user's name
- the
- Line 7: replace the
altattribute withauth()->user()->name - Line 11: replace
My Namewithauth()->user()->name - Line 12: replace
route('home')withroute('dashboard') - Line 13: replace
route('home')withroute('profile.show')
@auth <x-jet-dropdown align="right" width="48"> {{-- avatar --}} <x-slot name="trigger"> <img class="rounded-full h-8 w-8 object-cover cursor-pointer" src="https://ui-avatars.com/api/?name={{ urlencode(auth()->user()->name) }}" alt="{{ auth()->user()->name }}"> </x-slot> <x-slot name="content"> {{-- all users --}} <div class="block px-4 py-2 text-xs text-gray-400">{{ auth()->user()->name }}</div> <x-jet-dropdown-link href="{{ route('dashboard') }}">Dashboard</x-jet-dropdown-link> <x-jet-dropdown-link href="{{ route('profile.show') }}">Update Profile</x-jet-dropdown-link> <div class="border-t border-gray-100"></div> <x-jet-dropdown-link href="{{ route('home') }}">Logout</x-jet-dropdown-link> <div class="border-t border-gray-100"></div> {{-- admins only --}} ... </x-slot> </x-jet-dropdown> @endauthCopied!
1
2
3
4
5
6
7
8
9
10
11
12
13
14
15
16
17
18
19
20
21
2
3
4
5
6
7
8
9
10
11
12
13
14
15
16
17
18
19
20
21
# Update the Dashboard page
- Open the resources/views/dashboard.blade.php file:
- Comment out the original code
- Add the code below to the page
dashboard.blade.php
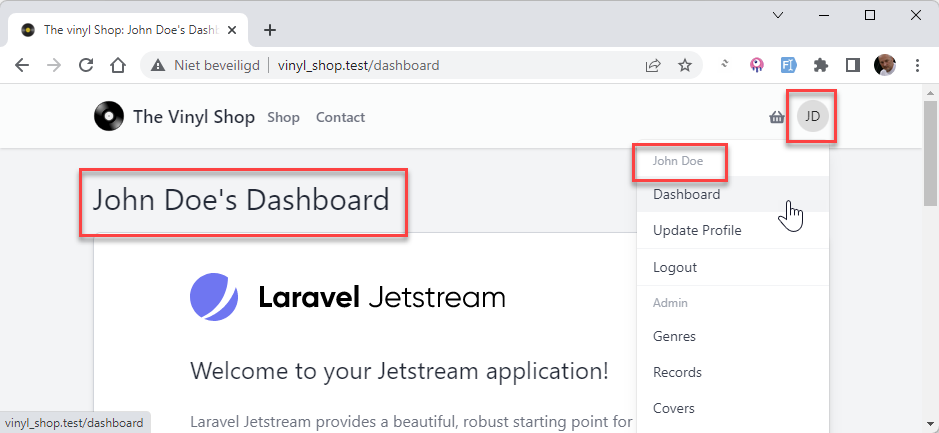
result
- We leave the
<x-jet-welcome/>component on the page, but you can remove it if you want and add some content of your own
<x-vinylshop-layout> <x-slot name="description">dashboard</x-slot> <x-slot name="title">{{ auth()->user()->name }}'s Dashboard</x-slot> <x-tmk.section> <x-jet-welcome/> </x-tmk.section> </x-vinylshop-layout>Copied!
1
2
3
4
5
6
7
8
2
3
4
5
6
7
8
# Update the Profile page
- Open the resources/views/profile/show.blade.php file:
- Comment out the original code
- Add the code below to the page
show.blade.php
result
<x-vinylshop-layout> <x-slot name="description">profile</x-slot> <x-slot name="title">Profile</x-slot> @if (Laravel\Fortify\Features::canUpdateProfileInformation()) @livewire('profile.update-profile-information-form') <x-jet-section-border/> @endif @if (Laravel\Fortify\Features::enabled(Laravel\Fortify\Features::updatePasswords())) <div class="mt-10 sm:mt-0"> @livewire('profile.update-password-form') </div> <x-jet-section-border/> @endif @if (Laravel\Fortify\Features::canManageTwoFactorAuthentication()) <div class="mt-10 sm:mt-0"> @livewire('profile.two-factor-authentication-form') </div> <x-jet-section-border/> @endif <div class="mt-10 sm:mt-0"> @livewire('profile.logout-other-browser-sessions-form') </div> @if (Laravel\Jetstream\Jetstream::hasAccountDeletionFeatures()) <x-jet-section-border/> <div class="mt-10 sm:mt-0"> @livewire('profile.delete-user-form') </div> @endif </x-vinylshop-layout>Copied!
1
2
3
4
5
6
7
8
9
10
11
12
13
14
15
16
17
18
19
20
21
22
23
24
25
26
27
28
29
30
31
32
33
34
35
36
37
38
2
3
4
5
6
7
8
9
10
11
12
13
14
15
16
17
18
19
20
21
22
23
24
25
26
27
28
29
30
31
32
33
34
35
36
37
38
# Logout
- When you look at the Logout link in the navigation component, you will see that it is a link to the
homeroute - Let's change this to a link to the
logoutroute
nav.blade.php
result
<x-slot name="content"> {{-- all users --}} ... <div class="border-t border-gray-100"></div> <x-jet-dropdown-link href="{{ route('logout') }}">Logout</x-jet-dropdown-link> <div class="border-t border-gray-100"></div> ... </x-slot>Copied!
1
2
3
4
5
6
7
8
2
3
4
5
6
7
8
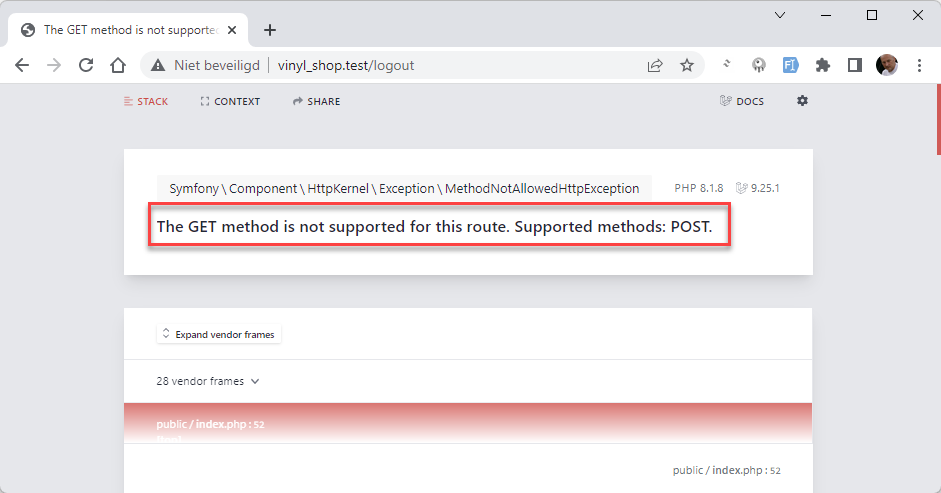
- This will not work because the
logoutroute is a POST route (not a GET route like the other routes) and we can't use a POST route in a link - We need to use a form to submit the POST request
- Let's try to replace the link with a form that submits the POST request to the
logoutroute
(The classes on the submit button are copied from thex-jet-dropdown-linkcomponent)
nav.blade.php
result
<x-slot name="content"> {{-- all users --}} ... <div class="border-t border-gray-100"></div> <form method="POST" action="{{ route('logout') }}"> <button type="submit" class="block w-full text-left px-4 py-2 text-sm leading-5 text-gray-700 hover:bg-gray-100 focus:outline-none focus:bg-gray-100 transition">Logout</button> </form> <div class="border-t border-gray-100"></div> ... </x-slot>Copied!
1
2
3
4
5
6
7
8
9
10
2
3
4
5
6
7
8
9
10
CSRF protection
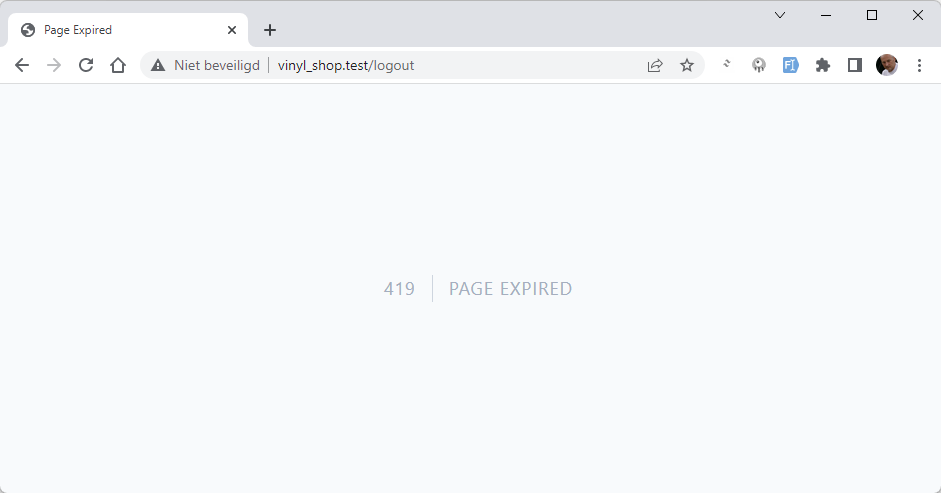
- If you test/submit the form, you get a 419 | Page Expired error, because Laravel automatically protects your application from cross-site request forgery (opens new window) (CSRF) attacks
- Laravel generates a "token" for each active user session
- When you submit a form (with a POST request), Laravel checks whether this token corresponds to the mandatory token of the form
- Add a CSRF token to the form using the
@csrfBlade directive, which injects a hidden field (check the source code in the browser) - Now the form will work
<x-slot name="content"> {{-- all users --}} ... <div class="border-t border-gray-100"></div> <form method="POST" action="{{ route('logout') }}"> @csrf <button type="submit" class="block w-full text-left px-4 py-2 text-sm leading-5 text-gray-700 hover:bg-gray-100 focus:outline-none focus:bg-gray-100 transition">Logout</button> </form> <div class="border-t border-gray-100"></div> ... </x-slot>Copied!
1
2
3
4
5
6
7
8
9
10
11
2
3
4
5
6
7
8
9
10
11
# Protecting Routes with Middleware
- Middleware (opens new window) can be used to allow only the authenticated users access to a given route
- Laravel ships with built in auth middleware
- Since this middleware is already registered in your HTTP kernel, all you need to do is attach the middleware to a route or route group definition
- Open routes/web.php
- Protect the 'admin' route group with the auth middleware
middleware(['auth']), such that these routes are only available to authenticated users
Route::middleware(['auth'])->prefix('admin')->name('admin.')->group(function () { Route::redirect('/', '/admin/records'); Route::get('records', [RecordController::class, 'index'])->name('records.index'); });Copied!
1
2
3
4
2
3
4
- Check the URL http://vinyl_shop.test/admin/records (opens new window)
- As a guest, you are directed to the login page
- As an authenticated (logged in) user, you see the view admin/records/index.blade.php, regardless whether you have admin rights or not
# Make admin middleware
- Yet, our site has normal users and admins and the records page should only be accessible by admins
- Create a new admin middleware with the command
php artisan make:middleware Admin - Open the file app/Http/Middleware/Admin.php
- Update the
handle()method- The
abort()helper function sends you to an error page. The first argument determines which specific error page must be shown, and the second (optional) argument can be used to provide a specific error message.
- The
- Create a new admin middleware with the command
class Admin { public function handle($request, Closure $next) { if (auth()->user()->admin) { return $next($request); } return abort(403, 'Only administrators can access this page'); } }Copied!
1
2
3
4
5
6
7
8
9
10
2
3
4
5
6
7
8
9
10
NAMING CONVENTIONS
- The name of a middleware starts with a capital letter (e.g.
Admin) as it corresponds to a class
- Open app/Http/Kernel.php and register the admin middleware to the
$routeMiddlewarevariable
protected $routeMiddleware = [ 'auth' => \App\Http\Middleware\Authenticate::class, ... 'admin' => \App\Http\Middleware\Admin::class, ];Copied!
1
2
3
4
5
2
3
4
5
# Add middleware to the route group
- Add the admin middleware, AFTER the auth middleware, to the 'admin' route group
Route::middleware(['auth', 'admin'])->prefix('admin')->name('admin.')->group(function () { Route::redirect('/', '/admin/records'); Route::get('records', [RecordController::class, 'index'])->name('records.index'); });Copied!
1
2
3
4
2
3
4
- Open http://vinyl_shop.test/admin/records (opens new window)
- If you login as an admin, you see all the records
- If you have no admin rights, you'll see the 403 error page (with a customized message)

- Look at the routes table to see which middleware belongs to a specific route
# Hide admin menu item for non-admins
- Open resources/views/layouts/nav.blade.php
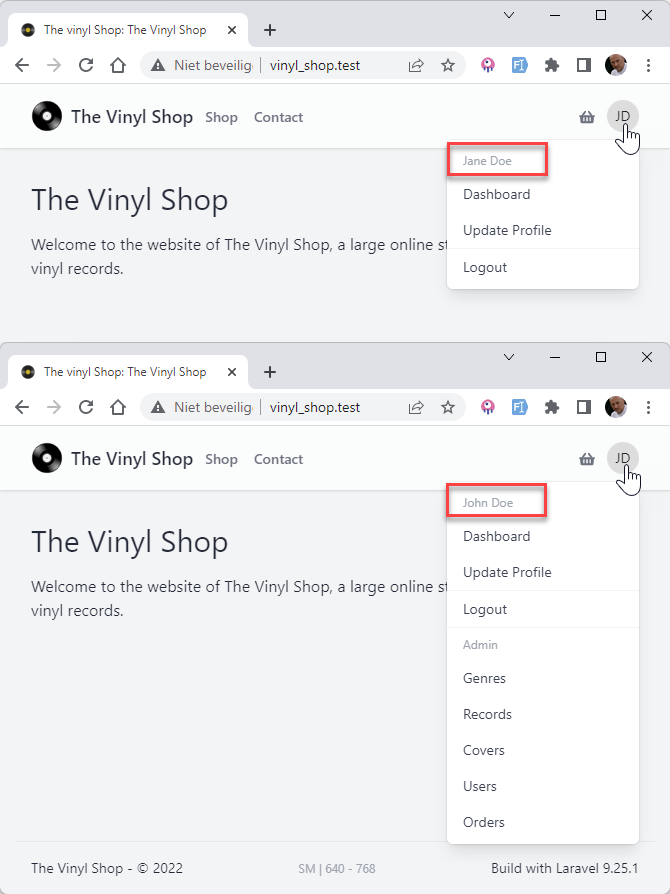
- Add a
@if(auth()->user()->admin) ... @endifBlade directive surround the admin menu item to hide it for non-admins
nav.blade.php
result
- Jane Doe is a normal user and does not have admin rights
- John Doe is a user with admin rights
@auth <x-jet-dropdown align="right" width="48"> {{-- avatar --}} ... <x-slot name="content"> {{-- all users --}} ... <form method="POST" action="{{ route('logout') }}"> ... </form> @if(auth()->user()->admin) <div class="border-t border-gray-100"></div> {{-- admins only --}} <div class="block px-4 py-2 text-xs text-gray-400">Admin</div> <x-jet-dropdown-link href="{{ route('home') }}">Genres</x-jet-dropdown-link> <x-jet-dropdown-link href="{{ route('admin.records.index') }}">Records</x-jet-dropdown-link> <x-jet-dropdown-link href="{{ route('home') }}">Covers</x-jet-dropdown-link> <x-jet-dropdown-link href="{{ route('home') }}">Users</x-jet-dropdown-link> <x-jet-dropdown-link href="{{ route('home') }}">Orders</x-jet-dropdown-link> @endif </x-slot> </x-jet-dropdown> @endauthCopied!
1
2
3
4
5
6
7
8
9
10
11
12
13
14
15
16
17
18
19
20
21
2
3
4
5
6
7
8
9
10
11
12
13
14
15
16
17
18
19
20
21
# Make active user middleware
- Yet, we want to ban all the auth pages from users that have a profile status of
activeisfalse- Create a new active user middleware with the command
php artisan make:middleware ActiveUser - Open the file app/Http/Middleware/ActiveUser.php
- Update the
handle()method- The
abort()helper function sends you to an error page. The first argument determines which specific error page must be shown, and the second (optional) argument can be used to provide a specific error message.
- The
- Create a new active user middleware with the command
class ActiveUser { public function handle(Request $request, Closure $next) { if (auth()->user()->active) { return $next($request); } // logout the user from the web guard auth('web')->logout(); // abort the request with a message return abort(403, 'Your account is not active. Please contact the administrator.'); } }Copied!
1
2
3
4
5
6
7
8
9
10
11
12
13
2
3
4
5
6
7
8
9
10
11
12
13
- Open app/Http/Kernel.php and register the ActiveUser middleware to the
$routeMiddlewarevariable
protected $routeMiddleware = [ 'auth' => \App\Http\Middleware\Authenticate::class, ... 'admin' => \App\Http\Middleware\Admin::class, 'active' => \App\Http\Middleware\ActiveUser::class, ];Copied!
1
2
3
4
5
6
2
3
4
5
6
- Add the active middleware, to the 'admin' route group and the 'auth' route group
Route::middleware(['auth', 'active', 'admin'])->prefix('admin')->name('admin.')->group(function () { Route::redirect('/', '/admin/records'); Route::get('records', [RecordController::class, 'index'])->name('records.index'); }); ... Route::middleware([ 'auth:sanctum', config('jetstream.auth_session'), 'verified', 'active', ])->group(function () { Route::get('/dashboard', function () { return view('dashboard'); })->name('dashboard'); });Copied!
1
2
3
4
5
6
7
8
9
10
11
12
13
14
15
16
17
18
2
3
4
5
6
7
8
9
10
11
12
13
14
15
16
17
18
- Change the
activestatus of the ITF User 1 user tofalsein the database - Try to login with the ITF User 1 user:
- Email:
itf_user_1@mailinator.comand password:itfuser1 - You'll be logged out
- You'll see the 403 error page (with customized message)
- Email:
