Open app/Http/Livewire/Shop.php and resources/views/livewire/shop.blade.php
Add the "add to basket" logic the component class and the view
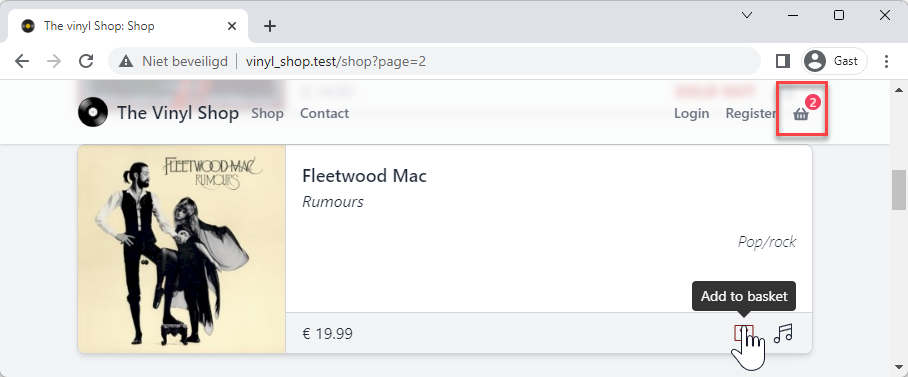
Line 3: add the wire:click directive to the Add to basket button
Line 4: remove "NOT IMPLEMENTED YET" from the the data-tippy-content attribute
 <x-phosphor-shopping-bag-light
        class="outline-0"
        wire:click="addToCart({{ $record->id }})"
        data-tippy-content="Add to basket"/>
1 2 3 4
Line 6: add the record to the basket
Line 7: emit a Livewire basketUpdated event to update the basket component and the navigation bar
Line 8 - 12: show a toast message that the record has been added to the basket
...publicfunctionshowTracks(Record $record){...}publicfunctionaddToCart(Record $record){
Cart::add($record);$this->emit('cartUpdated');$this->dispatchBrowserEvent('swal:toast',['background'=>'success','html'=>'Record added to the cart','position'=>'top-start',]);}...
1 2 3 4 5 6 7 8 9 10 11 12 13 14
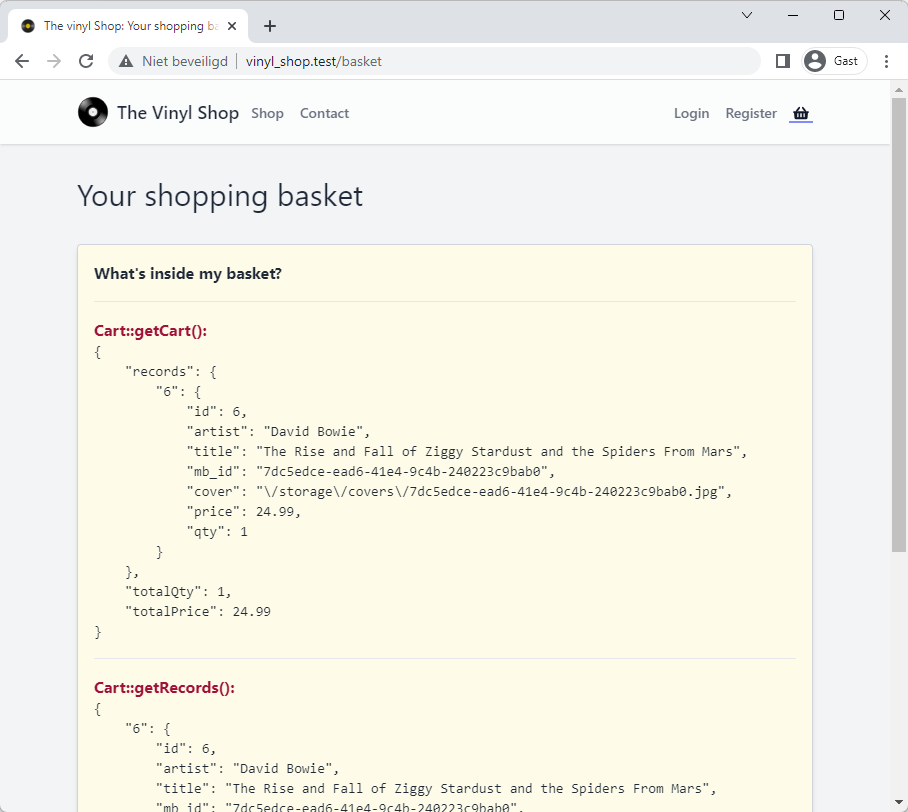
Add a record to the basket and check the result in the browser
E.g: The Rise and Fall of Ziggy Stardust and the Spiders From Mars by David Bowie
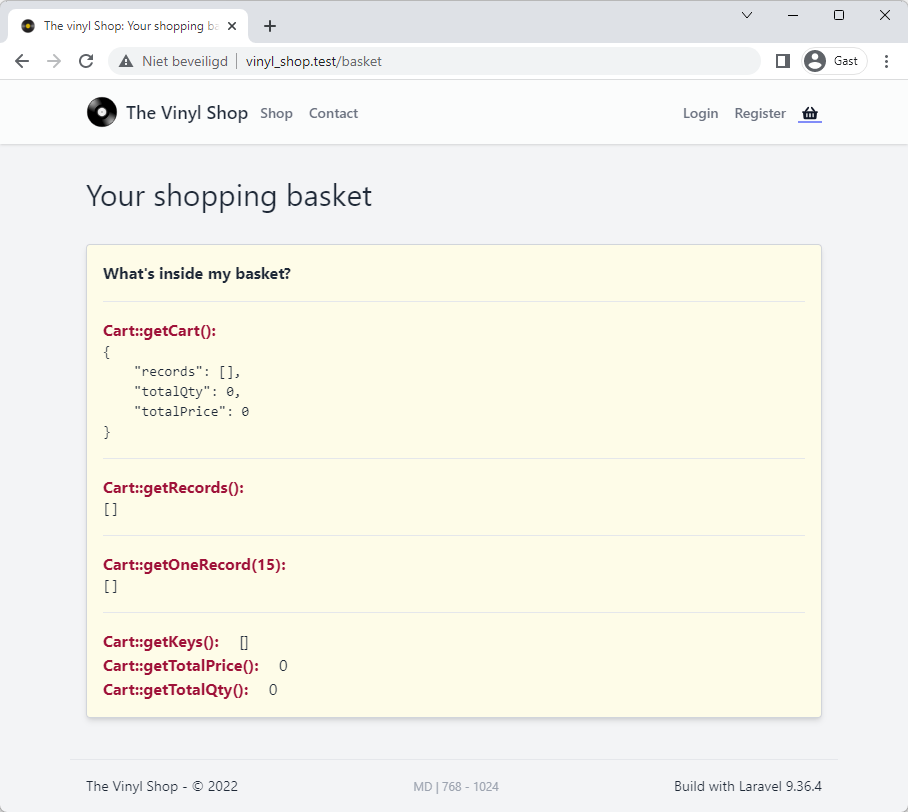
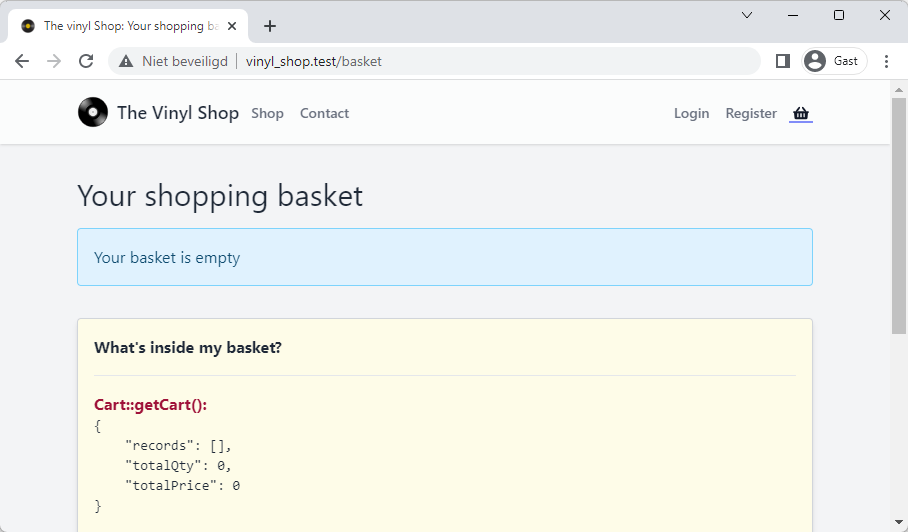
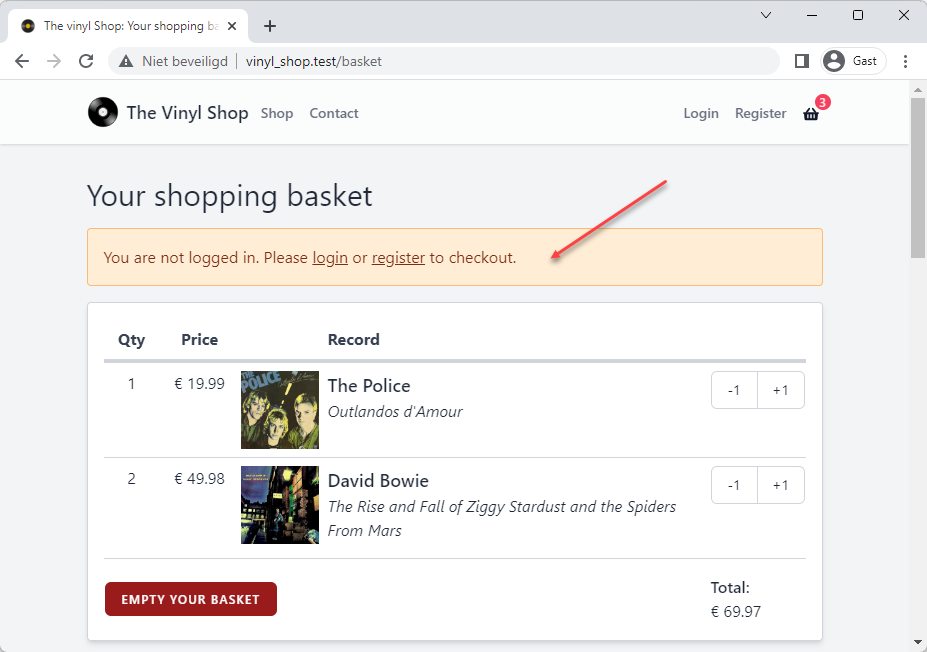
First, make sure that the cart when the page is loaded
Line 2: empty the basket when the view is rendered IMPORTANT: delete this line immediately after you've tested the functionality
Line 6 - 8: show a message if the cart is empty
<div>{{ Cart::empty()}}
@if(Cart::getTotalQty()===0){{-- Cart is empty--}}<x-tmk.alert type="info"class="w-full">
Your basket is empty</x-tmk.alert>
@else{{-- Cart is not empty--}}
@endif{{-- show this (debug) code only in development APP_ENV=local --}}
@env('local')...
@endenv
</div>
1 2 3 4 5 6 7 8 9 10 11 12 13 14 15 16 17 18
Don't forget to remove line 2 (Cart::empty()), otherwise the basket will be empty every time you reload the page and you won't be able to test the functionality
If a user tries to add more records to the basket than there are in stock, the user should be notified about the backorder
Line 3: add a $backorder property and set it to an empty array
Line 13 - 24: the updateBackorder() method checks if the quantity of the record is higher than the stock
Line 15: reset the $backorder property
Line 17 - 23: loop through all record keys in the cart
Line 18: get the quantity of the selected record
Line 19: fetch the selected record from the database
Line 20: check if the ordered quantity is higher than the stock
Line 21 - 22: if the quantity is higher than the stock, add the record to the $backorder property
Line 28: call the updateBackorder() method in the mount() method, so it's called every time something changes in the component
classBasketextendsComponent{public$backorder=[];protected$listeners=['cartUpdated'=>'$refresh'];publicfunctionemptyBasket(){...}publicfunctiondecreaseQty(Record $record){...}publicfunctionincreaseQty(Record $record){...}publicfunctionupdateBackorder(){$this->backorder=[];// loop over records in basket and check if qty > in stockforeach(Cart::getKeys()as$id){$qty= Cart::getOneRecord($id)['qty'];$record= Record::findOrFail($id);$shortage=$qty-$record->stock;if($shortage>0)$this->backorder[]=$shortage.' x '.$record->artist.' - '.$record->title;}}publicfunctionrender(){$this->updateBackorder();returnview('livewire.basket')->layout('layouts.vinylshop',['description'=>'Your shopping basket','title'=>'Your shopping basket']);}}
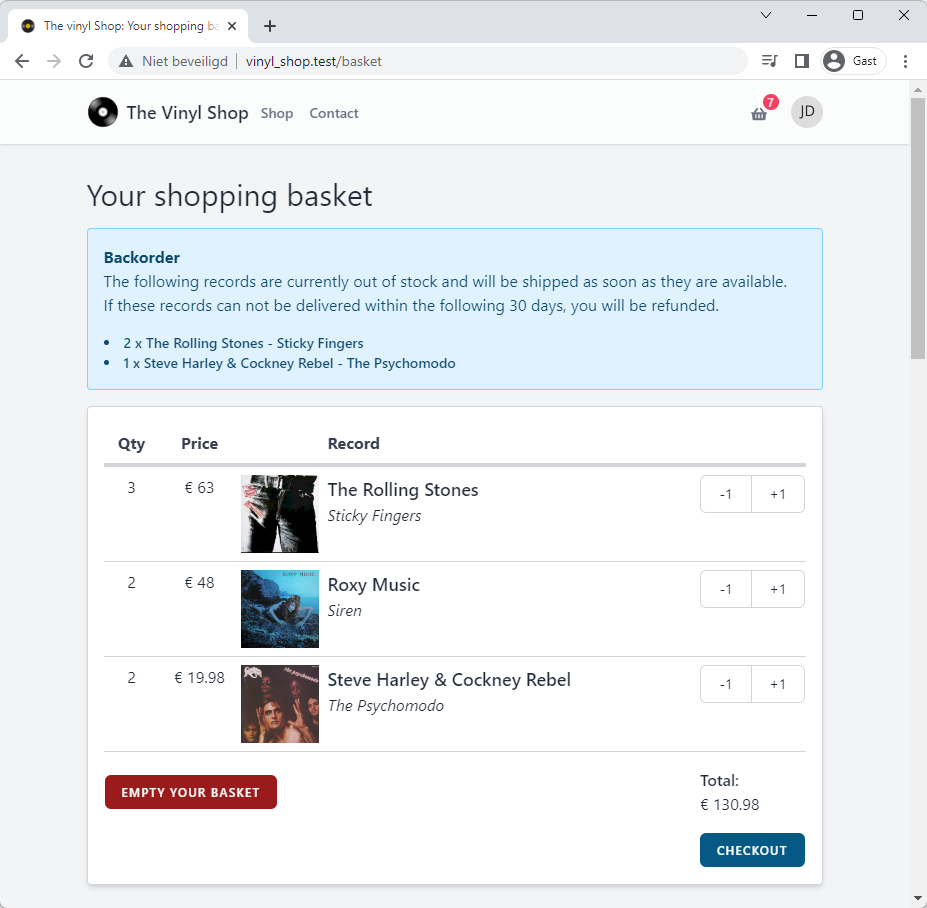
Line 2 - 13: if the $backorder property is not an empty array, show an alert with the backorder information
Line 8 - 9: loop through all items in the $backorder property and show them in a list
<div>
@if(!empty($backorder))<x-tmk.alert type="info" dismissible="false"class="mt-4"><p class="font-bold">Backorder</p><p> The following records are currently out of stock and will be shipped as soon as they are available.</p><p>If these records can not be delivered within the following 30 days, you will be refunded.</p><x-tmk.list type="ul"class="mt-4 text-sm font-semibold">
@foreach($backorderas$item)<li>{{$item}}</li>
@endforeach</x-tmk.list></x-tmk.alert>
@endif...</div>
1 2 3 4 5 6 7 8 9 10 11 12 13 14 15 16
Someone ordered:
3 items of Sticky Fingers from The Rolling Stones and we have only 1 item in stock
2 items of Siren from Roxy music (we have 4 items in stock)
2 items of The Psychomodo from Steve Harley & Cockney Rebel (we have 1 item in stock)
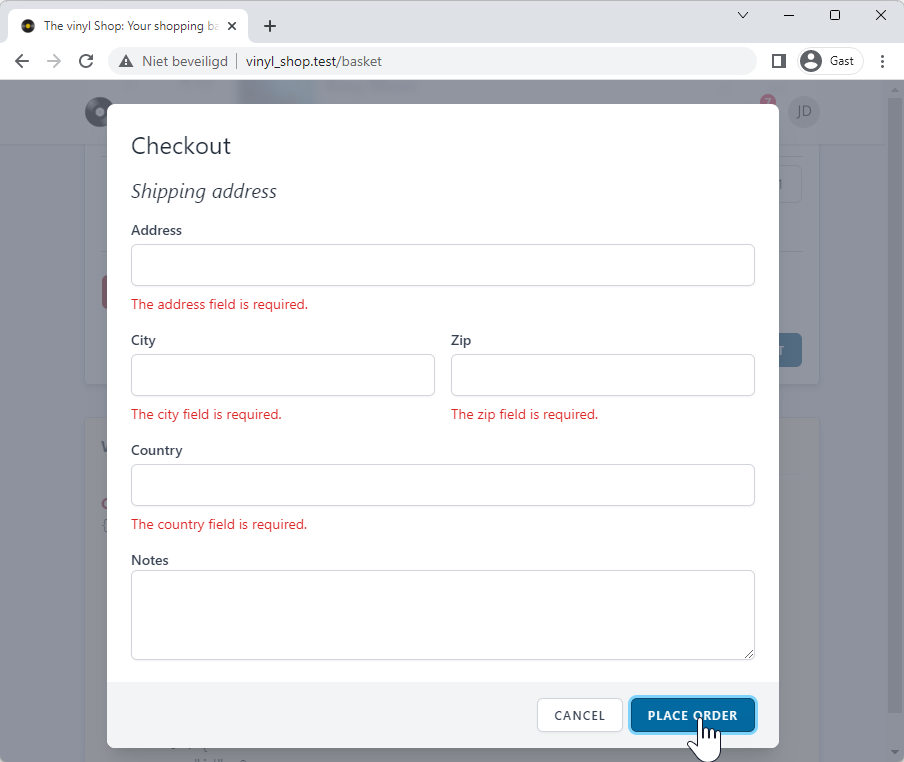
Line 5 - 11: add a $shipping property for the shipping address and set all keys to null
Line 14 - 19: add a $rules property for the validation rules
Line 22 - 27: add a $messages property for the validation messages
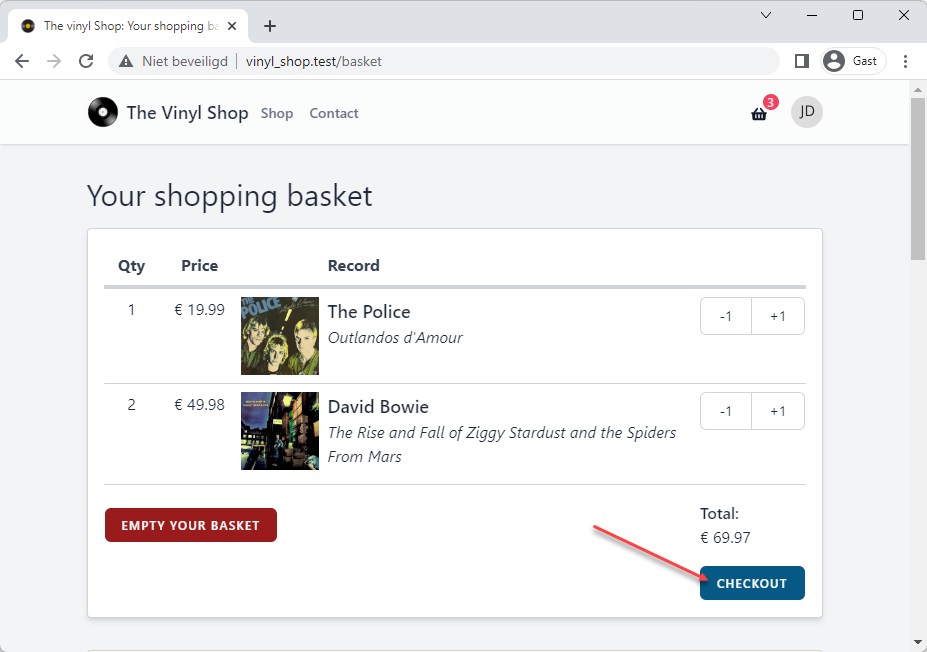
Line 39 - 44: the checkoutForm() method:
resets the $shipping property and the error bag
sets the $showModal property to true to show the modal
Line 46 - 74: the checkout process is called when the PLACE ORDER button is clicked, the code is straight forward:
validate the form (= shipping address)
close the modal
check for backorders (maybe another user ordered the same record in the meantime)
add the order to the database, update the stock and send the confirmation email
(these features are implemented in the next steps)
reset the $shipping property, the $backorder property and the error bag
empty the basket and refresh the component
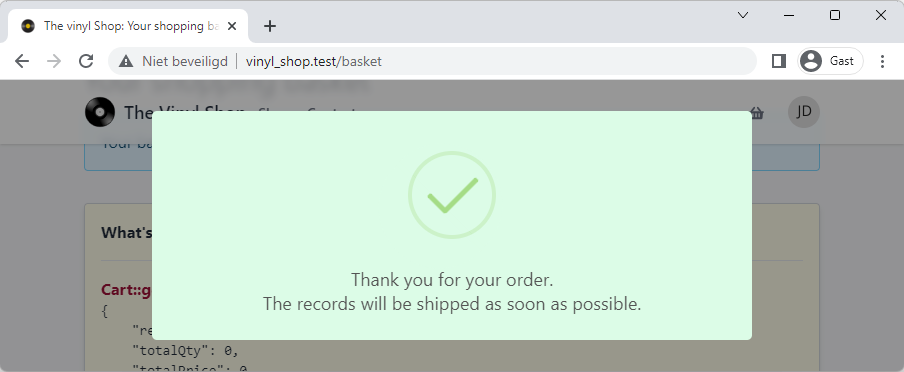
show a success message
classBasketextendsComponent{public$backorder=[];public$showModal=false;public$shipping=['address'=>null,'city'=>null,'zip'=>null,'country'=>null,'notes'=>null,];// validation rulesprotected$rules=['shipping.address'=>'required','shipping.city'=>'required','shipping.zip'=>'required|numeric','shipping.country'=>'required',];// validation attributesprotected$validationAttributes=['shipping.address'=>'address','shipping.city'=>'city','shipping.country'=>'country','shipping.zip'=>'zip',];protected$listeners=['cartUpdated'=>'$refresh'];publicfunctionemptyBasket(){...}publicfunctiondecreaseQty(Record $record){...}publicfunctionincreaseQty(Record $record){...}publicfunctionupdateBackorder(){...}publicfunctioncheckoutForm(){$this->reset('shipping');$this->resetErrorBag();$this->showModal=true;}publicfunctioncheckout(){// validate the form$this->validate();// hide the modal$this->showModal=false;// check if there are records in backorder$this->updateBackorder();// add the order to the database// update the stock// send confirmation email to the user and to the administrators// reset the shipping array, backorder array and error bag$this->reset('backorder');$this->resetErrorBag();// empty the cart
Cart::empty();$this->emit('cartUpdated');// show a confirmation message$this->dispatchBrowserEvent('swal:confirm',['icon'=>'success','background'=>'success','html'=>"Thank you for your order.<br>The records will be shipped as soon as possible.",'showConfirmButton'=>false,'showCancelButton'=>false,]);}publicfunctionrender(){...}}
Temporary comment out the Cart::empty() line in the checkout() method, so you don't have to add records over and over again to test the rest of the code
Temporary set fixed values for the $shipping property, e.g:
public$shipping=['address'=>'Kleinhoefstraat 4','city'=>'Geel','zip'=>'2440','country'=>'Belgium','notes'=>"Please leave the package at the front door.\nThank you.",];
1 2 3 4 5 6 7
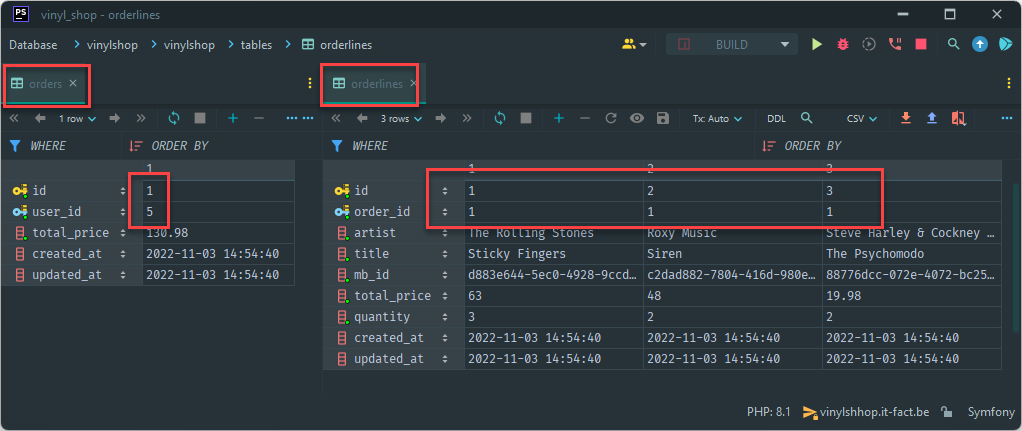
Take a look at the database and at the cart:
First you have to insert the user_id and the total_price from the cart session into a new row in the orders table.
Next, retrieve the order_id from the just inserted row
Finally, loop over all the records inside the cart and add a new row (with the order_id and the necessary columns) to the orderlines table
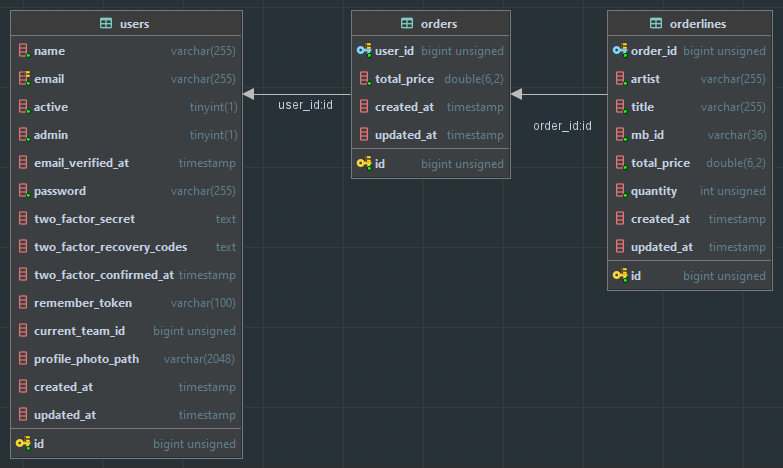
Why not use the Records table?
As you can see in the Orderlines table, some attributes (artist, title, mb_id) are duplicated from the Records table.
Why we do this?
Later in this course, we'll add a page where the user can see all his orders and if we rely on the Records table, we can have some problems:
The price of the record can change, but the price of the record in the order should stay the same
The record can be deleted from the Records table, but we still want to show the order
That's the reason why we duplicate the data from the Records table to the Orderlines table.
In the example below: one order contains 3 different records (= 3 orderlines)
Line 7 - 10: create a new order and add save it to the $order property, so we can easily get the order_id later
Line 12 - 20: loop over all the records in the cart and add a new row to the orderlines table
Line 14: $order->id is the order_id from the just inserted row in the orders table
Line 15 - 19: the other columns are retrieved from the cart session
Line 22 - 24: update the stock of the record
Line 22: get the record from the database
Line 23: update the stock value:
If the quantity in the cart is lower than the stock, subtract the quantity from the stock
If the quantity in the cart is higher or equal than the stock, set the stock to 0
Line 24: save the record to the database
publicfunctioncheckout(){...// add the order to the database// create a new order$order= Order::create(['user_id'=>auth()->user()->id,'total_price'=> Cart::getTotalPrice(),]);// loop over the records in the basket and add them to the orderlines tableforeach(Cart::getRecords()as$record){
Orderline::create(['order_id'=>$order->id,'artist'=>$record['artist'],'title'=>$record['title'],'mb_id'=>$record['mb_id'],'total_price'=>$record['price'],'quantity'=>$record['qty'],]);// update the stock$updateQty= Record::findOrFail($record['id']);$updateQty->stock>$record['qty']?$updateQty->stock-=$record['qty']:$updateQty->stock=0;$updateQty->save();}// send confirmation email to the user and to the administrators...}
Create a new OrderConfirmation mail class with the command php artisan make:mail OrderConfirmation --markdown=emails.order-confirmation
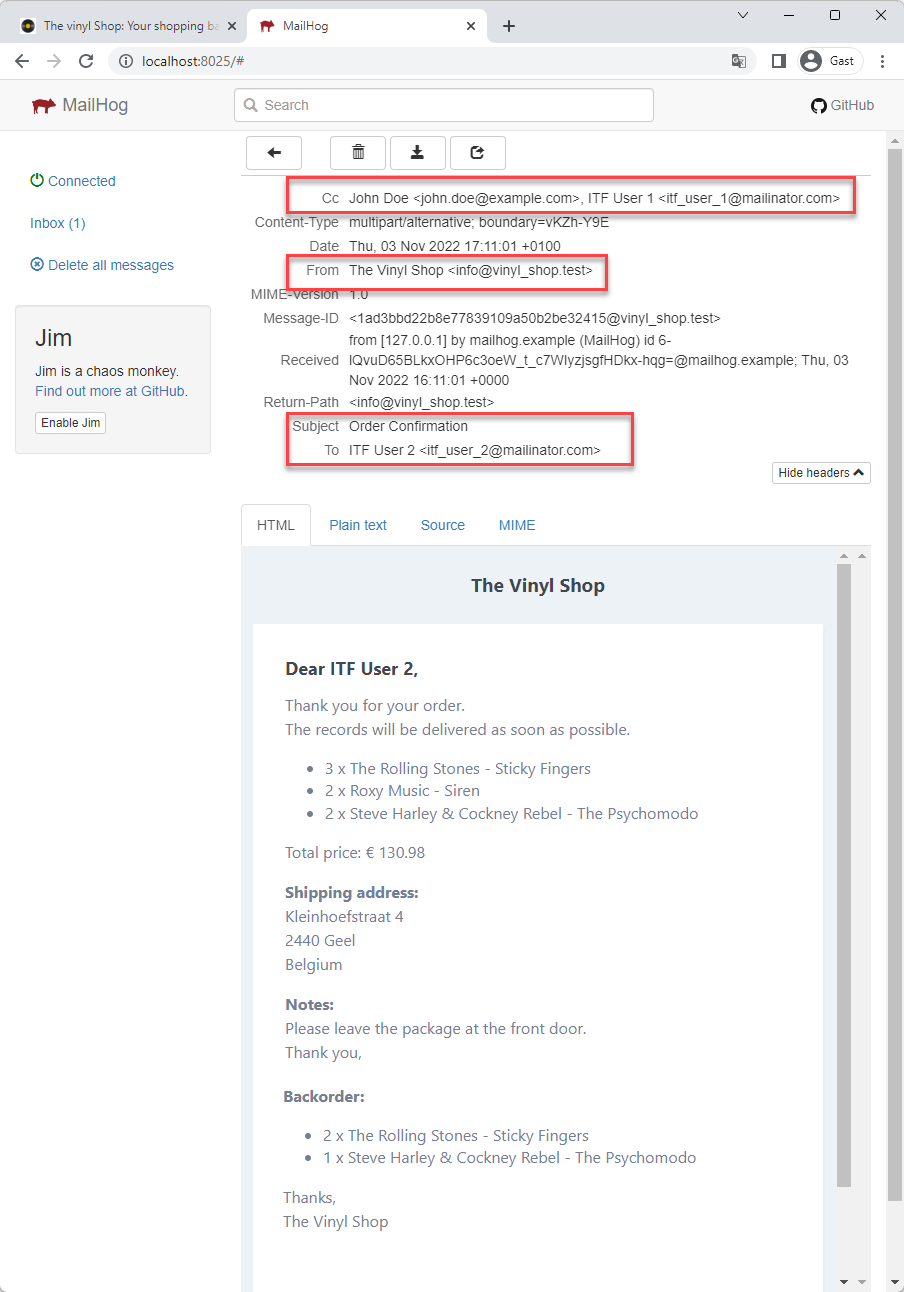
Line 5 - 25: construct the email body (some static text, the order details, the shipping details and the backorder details)
Line 27: get all the administrators from the database
Line 28 - 30: make a new variable $template of the ContactMail mailable class
Line 31 - 33: send the email with:
Line 31: $to is the user who placed the order
Line 32: $cc is the list of administrators
Line 33: $template is the OrderConfirmation mailable class
publicfunctioncheckout(){...// send confirmation email to the user and to the administrators$message='<p>Thank you for your order.<br>The records will be delivered as soon as possible.</p>';$message.='<ul>';foreach(Cart::getRecords()as$record){$message.="<li>{$record['qty']} x {$record['artist']} - {$record['title']}</li>";}$message.='</ul>';$message.="<p>Total price: € ". Cart::getTotalPrice()."</p>";$message.='<p><b>Shipping address:</b><br>';$message.=$this->shipping['address'].'<br>';$message.=$this->shipping['zip'].' '.$this->shipping['city'].'<br>';$message.=$this->shipping['country'].'</p>';$message.='<p><b>Notes:</b><br>';$message.=$this->shipping['notes'].'</p>';if(count($this->backorder)>0){$message.='<p><b>Backorder:</b></p>';$message.='<ul>';foreach($this->backorderas$item){$message.="<li>{$item}</li>";}$message.='</ul>';}// Get all admins$admins= User::where('admin',true)->select('name','email')->get();$template=newOrderConfirmation(['message'=>$message,]);
Mail::to(auth()->user())->cc($admins)->send($template);...}
Line 8 and 10: read the injected data from the constructor and assign it to the$data property
classOrderConfirmationextendsMailable{useQueueable, SerializesModels;public$data;/** Create a new message instance. ...*/publicfunction__construct($data){$this->data=$data;}/** Get the message envelope. ...*/publicfunctionenvelope(){...}/** Get the message content definition. ...*/publicfunctioncontent(){...}/** Get the attachments for the message. ...*/publicfunctionattachments(){...}}